If Jingle Bells has taught us anything, it's that dashing through the snow seems like a damn good time. Laughing all the way and making spirits bright, all while "Miss Fanny Bright" rides shotgun? Sounds pretty dope. Dashing off the side of the road in an uncontrolled skid, on the other hand ... Much less dope.
Of course that song was written in 1857, and chances are whatever you're driving has something a bit more substantial than "one horse" under the hood, in which case you're going to want to learn how to put on snow chains before taking off o'er the fields. Here's how to go about putting on tire chains.

How to find the right size snow chains
Getting the proper fit is the first and arguably most important step for choosing and using snow chains. Get a set that's too small, and you won't be able to get them on the tire. Go too big, and you won't be able to snug them down properly, which is both unsafe and can tear up your tires and wheels in short order.
The good news here is that finding the right size snow chains for your car is also the easiest part of the process. All you need to know is your tire size. If you already know what size rubber your car is sporting, you're ready to shop. If you're not sure, just walk out your front door and take a look at the sidewall of your tires.
The number you're looking for is typically written in big letters, separated by slashes, dashes, or spaces. Some are smaller and less obvious than others, but it should look something like the "255/30ZR20" in the image below:

A word on types of snow chains
Generally speaking, snow chains are pretty low-tech and have been around forever, and all work in more or less the same way by stretching lengths of chain over the tread of your tires to better "bite" into the snow and ice underneath. With that being said, some are simpler and/or more crude than others.
The two main factors you'll want to consider are (a) ease of installation and (b) how much you care about your wheels.
As far as installation goes, as we'll detail below, most chains require you to lay them out, drive over them, then secure them to your tires. Others use a "quick-fit" system that can be installed start to finish on a stationary vehicle. As you'll read, neither option is particularly difficult with a little practice, but just know some snow chains go on easier, faster, and with fewer steps than other.
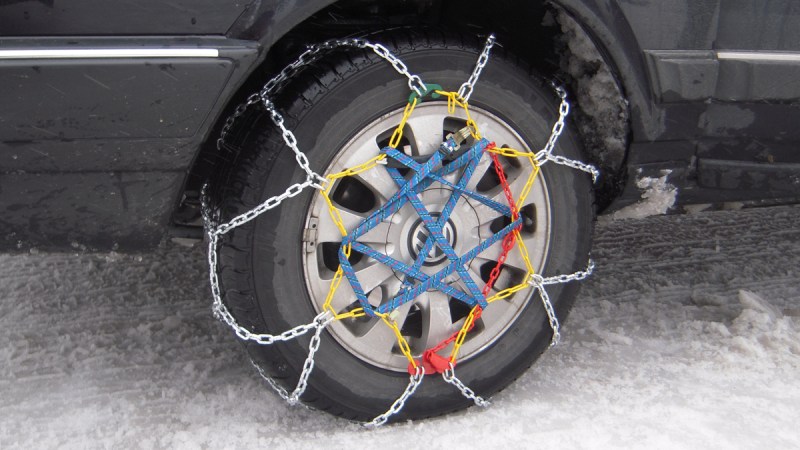
In terms of your wheels, the important thing to note is that some chains lay across the surface of your wheels, while others only touch the rubber surfaces of your tires. If you're a stickler for keeping your wheels nick, scratch, and ding free, you'll likely want to shop around for a set that doesn't stretch across the surface of your rims, or at least uses a protective/soft surface at any contact points on your wheel.

How to put on snow chains
Right. Down to business.
As stated above, some snow chains use unique hardware to attach and tighten, but 99% of chains all share the same basic attachment procedure. Here's how to go about that.
Step 1: Find somewhere safe and out of the way to park while you install your chains. Make sure your wheels are straight and that you set the parking brake before getting started. Safety first and all that.
Step 2: Take out your snow chains and determine which side of the chains hold all the fastening/tensioning mechanisms. Some use hooks, some use cams, and some use ratcheting systems, but they all use something. Whatever your chains use, you want to ensure the side with the fastening hardware goes on the outside of the tire.
Step 3: Once you've got heads or tails of which side is which, it's time to drape the chains over your tires. Which tires your chains go on depends on whether your vehicle is front, rear, or all-wheel drive. Snow chains always go on the driven wheels, so front-wheel drive cars get chains on the front, rear-wheel on the rear, etc.
If you're driving an all-wheel-drive or four-wheel-drive vehicle, typically your chains will go on the front tires to boost traction when steering, but always double-check your owner's manual because those folks probably know your car better than we do.
Start out by draping your chains over your tires, taking care to center them as much as possible with the middle of your tire tread. What we want here is for the bottom inch or two of your chains to sit on the ground, tucked directly in front of the tire, while the remaining slack hangs back toward the rear of the vehicle.
Step 4: Hop back in your car, release the e-brake, and drive about two feet straight forward to get both open ends of the chains around to the rear of the tire. Set the e-brake again, hop back out, and connect the open ends of the chains on both the inside and outside of your tires.
Step 5: Once the chains are connected, it's time to tension them down. The goal here, regardless of how your chains tighten, is to get your snow chains snug enough that they won't squirm around as you drive. Tighten your chains down until you can't wiggle them around on your tread by hand.
Step 6: Once everything feels nice and secure, get back in your vehicle and drive two to three car lengths straight ahead. Once again, park and set your e-brake, then get out and recheck the tension of your snow chains.
Driving this short distance allows your chains to "settle" and distribute any remaining slack. Give both chains a good tug to make sure they're still safely secured to your tires. If either one has loosened up, tighten them down again, then repeat this step. Once you've confirmed your chains are nice and tight, you're all done and it's time to hit the road.

How to drive with snow chains
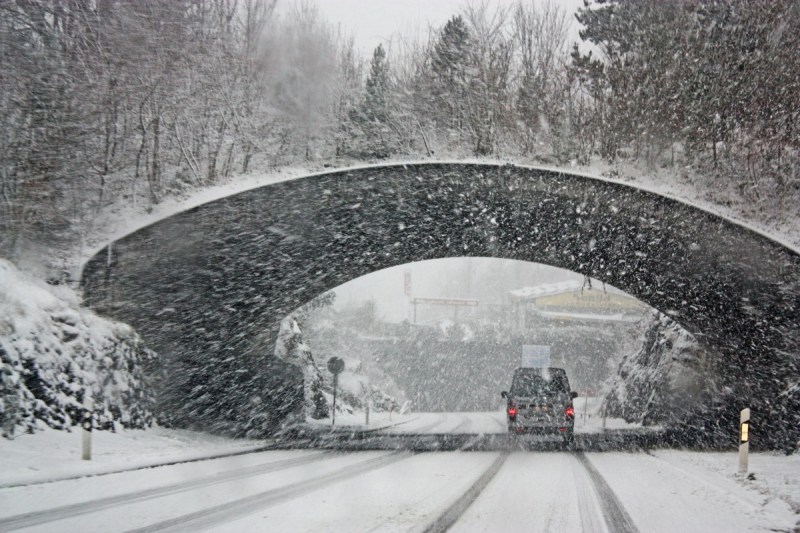
Once your chains are secured, proceed to drive as you normally would in snowy or icy conditions. If you missed our guide on how to drive in the snow, now is the time to check it out.
Apart from that, there are two main things to keep in mind when driving with snow chains on your car.
First, you should never drive over 25mph with chains on your tires, no matter how well you've snugged them down. Snow chains create an imbalance on your driven wheels, which can lead to high-speed wobbles or outright failure at faster speeds. Both of which are a serious safety issue, so don't risk it.
Second, once you get through the snowy portion of your drive, you should take your snow chains back off immediately. On dry pavement, snow chains damage the roads, aggressively wear down your tires, and can even be worn down to the point of failure after a few short miles. We know taking them on and off is a pain (especially when it's painfully cold outside), but keeping them on just isn't worth the risk or expense.

Alternatives to snow chains
While snow chains are excellent for getting traction when you are driving in hazardous and slippery conditions, they aren't the only solution. While they all have their advantages and disadvantages, these alternatives will help keep you safe in the winter if you don't want to deal with chains.
The first, and the most obvious, is snow or winter tires. These are designed for better traction, with deeper treads for snow. Some are even studded to give you a better grip (though in some states it's illegal to drive with studded tires outside the winter months, check your local DMV to see when they have to come off). The disadvantage to winter tires is, unless you live way up north where it snows all year long, you're eventually going to have to take them off and store them somewhere, so space could be an issue.
Snow cables are a lighter-weight alternative to chains, and they work just the same way. They are usually easier to install than chains, and if they break, they won't cause as much damage to your ride as a broken chain would. A disadvantage to cables is that they wear out faster than chains, but they are a good choice if you only need them infrequently.


