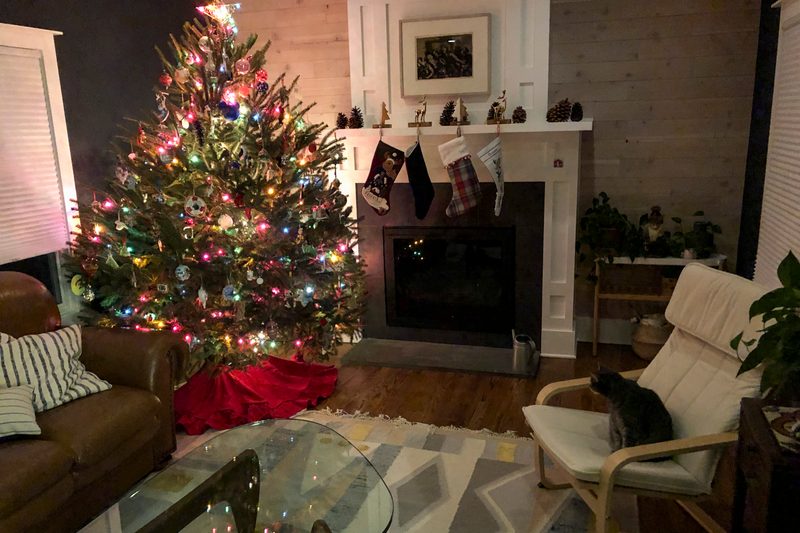
What could be finer than beholding a Christmas tree decked with ornaments and aglow with hundreds of twinkling lights perched nearby the crackling fireplace as you sip a winter IPA, a book on your knee, children soundly asleep, and a gentle snow falling outside on cold winter night? If you answered pretty much nothing, then you’re right. That’s the tops, right there. Christmas trees have been a part of winter holiday celebrations for at least a thousand years, and today serve as the primary seasonal decoration on many homes.

As lovely as the Christmas tree is once installed and decorated in your home, the process of getting the tree inside can be a headache and a half. There’s the mess of the needles, the pain of getting the trunk secured into the tree stand and balanced upright, the awkward stretching and bending and inevitable face poking during the stringing of the lights, and so on. To take the sting out of the Christmas tree installation process, we’ve put together a list of Christmas tree hacks that will save you time and save you from frustration as you bring that evergreen charm into your home.
This year, my family started a new tradition of cutting down our own tree. We went to a farm about an hour from home, found a fine-looking tree among the rolling hills of a tree farm, and sawed that fir right on down. With a hand saw. First tip? Use a reciprocating saw or a chainsaw if you cut the thing down yourself! But from here on out, whether you cut your own Christmas tree or you get on from a lot, the Christmas tree tips will be the same.
Attaching the Tree Stand
Do It While the Tree Is Horizontal
Arguably, the worst part of setting up a Christmas tree is the process of lowering its trunk down into the tree stand, then getting it perfectly erect, then securing the tree safely in its base. The ordeal involves backache, scratched skin, poked eyes, and marital strife. This year, simply put the tree stand onto the bottom of the tree while it’s still attached to the roof of your car or sticking out the back of your truck. (Or get the tree down from the car and put the stand on while it lies on its side on the ground or a table.)
Once you have the stand attached, don’t bring the tree inside, though! Stand it up and make sure it’s upright and stable, then cut away that mesh the helpful tree farm folks wrapped around it. Now, let’s make your tree look great!
Shaping Your Tree
Use a Hedge Trimmer
Truth be told, I didn’t think of this hack until after our tree was inside — and painlessly set-up thanks to the base already being attached! — so it involved a fair amount of cleanup, but it was worth it for a well-shaped tree that took about five minutes’ worth of work.
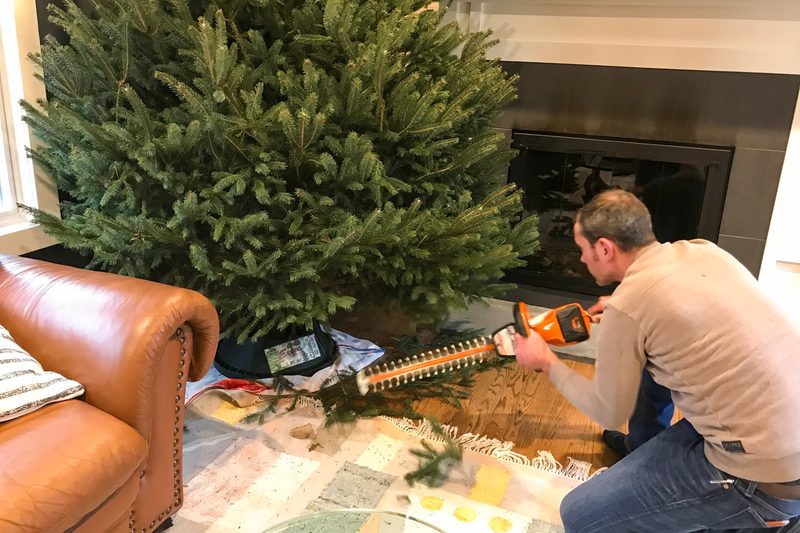
Take a good look at your tree standing there (outside) your home. It looks nice, sure, but not perfect, eh? Well, no problem — you can whip it into shape in no time! Or trim it into shape, rather. I used a battery-powered hedge trimmer to quickly sculpt our tree into a pleasing cone shape, nipping off branches that stuck too far out from the rest and giving the bottom of the fir a uniform height. Then my wife and I spent 10 minutes cleaning up branches and needles, so again, do this outside!
Cleaning Loose Needles and Debris
Use a Blower
A live Christmas tree is going to drop needles in your home. That’s just a fact. And it will deposit an inordinate amount of these needles as you bring it into the house, squeezing through doorways and around furniture. You can minimize the mess, however, by clearing most of the loose needles and other debris clinging to the branches while still outside. Of course, you should first do a few good ol’ thumps, lifting the tree a few inches off the ground then plopping it down, dropping a plethora of needles in the process. But then grab a blower and give that tree a good long blast of air. Work from the top to the bottom, the bottom to the top, side to side, and make sure to get the tip of the blower deep into each layer of branches. You’ll blow away thousands of loose needles, dust, deciduous leaves that came along for the ride, bugs, and more.
Putting Up the Christmas Lights
Do It While the Tree Outside
Rather than crawling and stretching and grunting your away around the sides and back of your tree as you light it, enjoy easy access to all parts of the tree by putting on the lights while it’s still standing outside. (You checked the strands already, right?) I also recommend placing the end of a medium-duty extension cord with several outlet taps near the center of the trunk, securing it by wrapping the cord around a branch, and then feeding its male end down past the base of the trunk, leaving plenty of slack to reach the outlet inside. That way, you can start strands of lights from this hub and not worry about always finding the end of the previous string of lights.


By putting the Christmas tree lights on outside, you get easy access to all parts of the tree and you further reduce the dropped needle mess inside.
Preparing for Disposal
Put a Bag Under the Tree Stand
Sure, it’s sad to think about tossing your tree before it’s even set up and decorated, but let’s be reasonable here: January You will thank Early-Holiday-Season You for the foresight. Partially open a disposal bag and place it where you’re about to set up the tree, then finally carry your blown clean and light-wrapped tree inside and plop it down in place. Tuck the bag down around the stand, fill that thing with water, cover the unsightly bag situation with a fine tree skirt, and get to decorating!
There, that wasn’t so bad, was it? Now … what to do with your Christmas tree when the season is over?
Article originally published November 28, 2018. Special thanks to GMC for the loan of a 2019 GMC Sierra Denali pickup truck