There’s a solid chance you learned how to bake bread during the pandemic. Seems like we all took on a few immersive hobbies to get through the longest weeks and months. Now that we’re all familiar with sourdough and its creation, let’s take it one step further.
We’re talking, of course, about the ultimate edible vessel: The bread bowl. It holds your favorite soup and instead of needing a rinse and a wash post-meal, it simply gets devoured. The best ones hold their integrity, making the last soup-soaked bites some of the best.
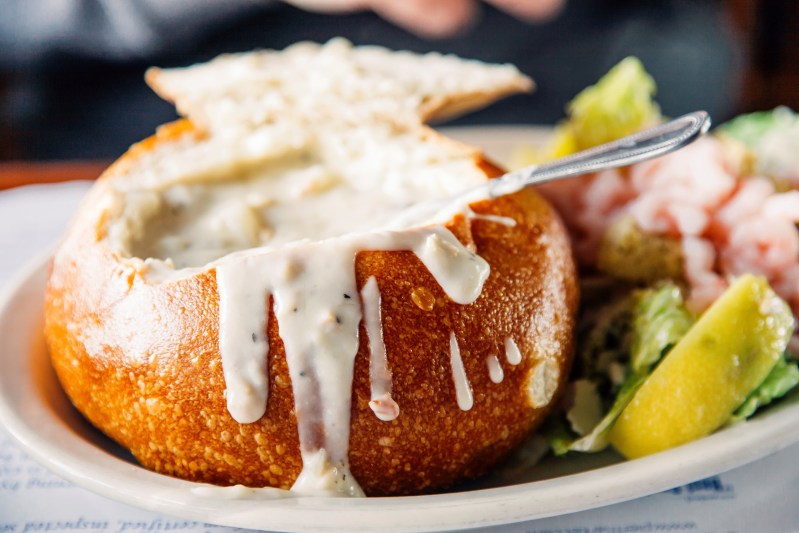
Half the fun of the bread bowl is deciding what to put in it. Soup is an obvious choice but you could also throw in a winter stew or even a good tomato sauce with some meatballs (or plant-based balls). Seafood fans should opt for a nice clam chowder or cioppino while purists can enjoy something as simple as a hearty pour of good olive oil, with a few drops of balsamic. Throw a good spinach dip in there or go Swiss and dump in some melted cheese. Tear off pieces of the bowl from the top-down, dipping as you go.
As you can see, a lot can be done with the bread bowl. Here are some tips on making them, along with a recipe.
What Kind of Bread Do You Use To Make a Bread Bowl?
There are a few things to keep in mind when making a bread bowl. First, the type of bread. Sourdough is a universal classic and arguably the best choice. But you can go with something more rustic as well, opting for wheat or making sure you plug in a quality olive oil instead of vegetable oil. You can even go rye or pumpernickel if you like those flavors. Sesame seeds make for a nice addition, too, if you’re looking to impart a little extra flavor to the bread itself.
Now, there’s no rule that says you have to make the entirety of the thing. Even a bread bowl you carve out of a small, pre-bought loaf is a step in the right direction. Look for something roughly bowl-sized at the store and carve it like you would a pumpkin, hanging on to the pieces you remove for future dunking. This version won’t be fully fresh, but you can inject some texture by giving it a flash broil before filling it, making the crust and exterior a little crisp.
Tips and Tricks Making Homemade Bread Bowls
Now, if you’re making the bowl from scratch, keep a few things in mind. One, try to create a flat base for the bread. Round is great, but if you end up with a sphere it won’t rest on the table quite as well. Two, apply some pressure to the interior of the bread, flattening it a bit. This will up its integrity and allow it to take on more soup or filling. Third, play around with the texture a bit. You can throw the finished product in an air fryer briefly if you want it a little more toasted. Or, save the lid you removed and bake that up with some oil for some crude but delicious crackers to crumble over your chowder.
Homemade Bread Bowl Recipe
This Kitchn recipe is a little involved, but so are most things in the baking realm. It’s worth the effort and yields some delectable bowls you can proudly say you crafted.
Prep Time: 2 and 1/2 hours
Total Time: 25 minutes
Yield: 6 servings (1 bread bowl per person)
Ingredients:
- 2 cups warm water
- 2 packets of dry active yeast (1/4-ounce per packet)
- 1 tbsp granulated sugar
- 6 cups flour
- 1.5 tbsp Kosher salt
- 1 tbsp vegetable oil
- 1 large egg
Directions:
- Mix warm water, yeast, and sugar in mixing bowl and whisk to combine until foamy, about 8 minutes. Meanwhile, mix flour and salt in large bowl and whisk to combine.
- Attach dough hook and turn the mixer on to the lowest speed. Add vegetable oil and beat until combined. Gradually add the flour mixture 1 cup at a time, making sure each addition is fully incorporated before adding the next. Continue mixing until a shaggy dough forms. Increase the speed to medium-high and mix until the dough is mostly smooth and feels like putty, and doesn’t stick to the sides of the bowl, 8-10 minutes. (To make by hand, stir the flour mixture in with a wooden spoon, then knead on a work surface for about 14 minutes.)
- Remove the dough from the bowl. Coat the bowl with vegetable oil, then return the dough to the bowl. Cover the bowl with plastic wrap. Let the dough rise in a warm place until doubled in bulk, about 45 minutes.
- Line 2 baking sheets with parchment paper. Punch down the dough and transfer to a work surface. Using a bench scraper or sharp knife, cut the dough into 6 pieces (about 7 1/2 ounces each).
- Shape one piece of dough at a time: Gather a portion of the dough from the side and fold it up and over the top to the center. Repeat, working your way around the piece, until a round forms. Flip the round over. Using the palms of both hands, roll the dough in tight circles against the work surface while pressing slightly down. The dough should be a little tacky and stick to the counter a little — this will help to create tension. Within a few circles, you will start to feel the dough tighten under your palms. Place on the baking sheet, 3 per baking sheet, spacing them evenly apart.
- Cover the loaves loosely with kitchen towels or plastic wrap. Let rise until doubled in size and puffed, about 40 minutes. Meanwhile, arrange 2 racks to divide the oven into thirds and heat the oven to 400 degrees Fahrenheit. Place 1 large egg and 1 tablespoon water in a small bowl and whisk together with a fork until well-blended.
- When the loaves have risen, uncover and brush with the egg wash. Score a 2-inch-long “X” on top of each loaf with a knife or bread lame. Let rest for 5 minutes.
- Bake until the tops are golden-brown or the center of a loaf registers 190 degrees F, 25-30 minutes. Transfer the loaves to a wire rack and let cool completely, 1 hour.
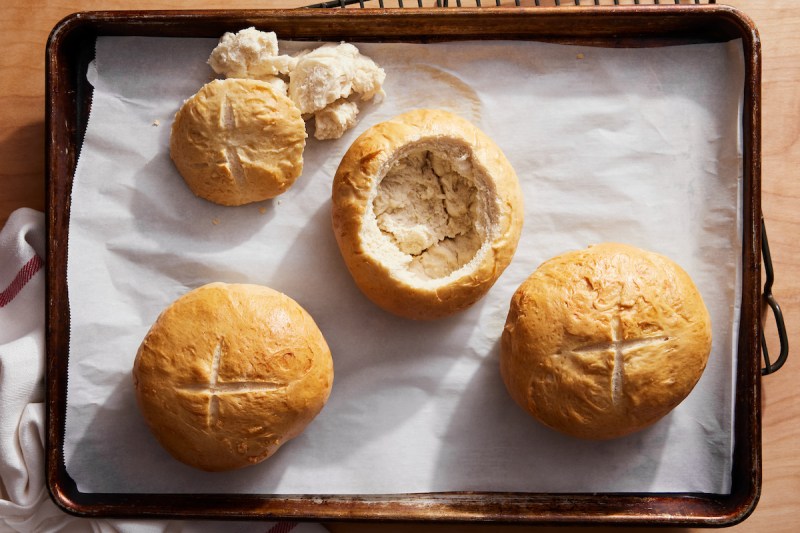
- To make bread bowls, cut a circle about 4 inches wide into the top of a loaf with a serrated knife. Remove the lid and pull off any pieces of bread that may be attached to the lid. Using your hands, hollow out the bowl by pulling out the interior, leaving the crust intact.