We’ve reached the home stretch. In part I and part II of our homebrewing series, we discussed equipment, ingredients, and the brewing process itself. Now it’s time to finish strong with fermentation, bottling, and of course, imbibing. Brewing was the hard part, and if you’ve been following along, you know it’s really not that hard. Now all you have to do is coast your way to completing your intoxicating homebrew. For help with part III, we’ve summoned the wisdom of Stan Barnes, Retail Manager at The Homebrew Exchange in Portland, OR.
Fermentation
Carboy vs. Bucket
After you’ve taken the initial gravity of the beer, pitched the yeast, stirred the beer, and secured the lid and airlock, the fermentation phase will begin in earnest. As discussed in the earlier parts of the series, most homebrewers use a plastic bucket, a glass carboy, or both if they opt for secondary fermentation. Stan Barnes has a few things to say about carboys and buckets: “Carboys are nice because they’re glass and they don’t scratch on the inside like buckets do. If your bucket scratches on the inside, it can harness more bacteria and other things that can affect the yeast.” On the other hand, plastic buckets are easier to clean, and generally better for beginning brewers.
Light and Temperature
Throughout the fermentation process, you’ll need to keep your beer in a closet or some other dark place. The hops are most affected by light, and can create a skunky flavor when exposed. “For most ales, you don’t want direct sunlight to be touching it at all, and you want the temperature anywhere between 65 and 75,” says Barnes. Generally speaking, it’s a good idea to keep your brew at the lower end of Barnes’ temperature range, as warmer fermentation will increase the likelihood of funky flavors (in a bad way). Also, some amount of ventilation is important, as the fermentation process creates heat. There are all sorts of ways you can regulate your beer’s temperature — a water bath and a FermWrap heater to name a couple.
Related: How to Make Beer Part I: Equipment and Ingredients
Primary and Secondary Fermentation
Some brewers separate fermentation into two phases: primary fermentation and secondary fermentation. However, you don’t have to mess around with secondary fermentation if you don’t want to. Secondary fermentation can add flavor complexity and clarity to your beer; however, many brewers say that secondary fermentation is not worth the risk, as it opens the beer up to oxidation. As a beginner, you probably shouldn’t bother with secondary fermentation — but, you know, do what you want. Generally speaking, both fermentation phases should last about 7 to 10 days, with a total fermentation time of at least 2 to 3 weeks.

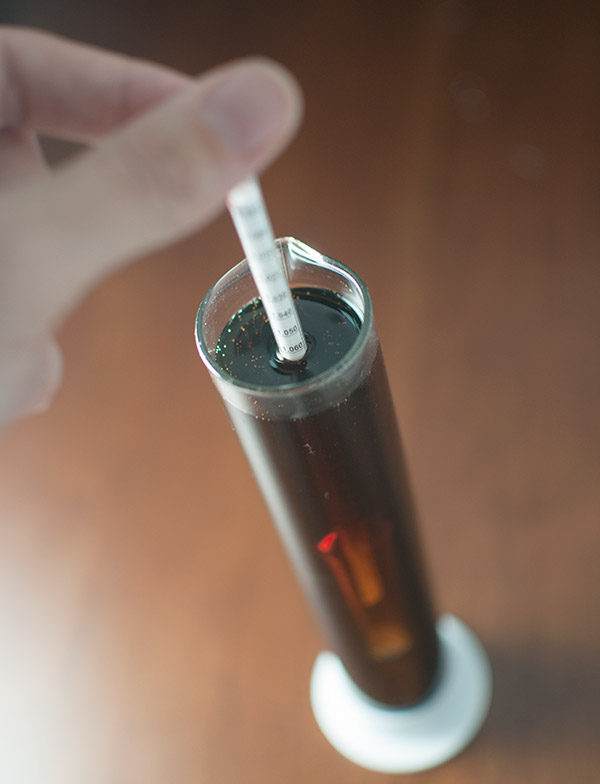
No, this isn’t the title of a terrible sci-fi film (yet), but rather the measure of your beer’s density at the end of the fermentation process. As you’ll remember in part II, you took the initial gravity of your beer. Well, now you’ll be taking the terminal gravity. Most beers should read somewhere between 1.012-1.018 on the hydrometer. You shouldn’t be in a huge rush to bottle your beer — you want to make absolutely sure that the yeast has completed its task of gobbling up the sugar. If there’s still a lot of sugar and active yeast in there, your beer will likely explode after bottling.
Also, you shouldn’t worry about bottling your beer the moment the moment the hydrometer reading reaches the sweet spot. “Some people actually prefer to let their beers age a little bit more,” says Barnes. “The hop flavor tends to back off the longer you let it age. If you’re trying to get more of your malt profile to come out, you might let it age longer.”
Bottling
Priming Sugar
Carbonation is a big part of what makes beer so refreshing. Adding priming sugar to your beer will make the yeast reactivate, which will in turn cause the beer to carbonate within the bottle. “Take ¾ of a cup of corn sugar or a cup of dry malt extract, boil that in about 20 oz of water, let it cool, then add it to your beer.” says Barnes.
You want to make absolutely sure that your priming sugar is thoroughly mixed into your beer. Otherwise, you might end up with some flat bottles of beer and some uber-carbonated bottles of exploding beer. Here’s Barnes’ recommendation: “Usually what I do is pour the priming sugar straight into the carboy or bucket, then rack (siphon) it into a bottling bucket.”
Sanitizing
Somewhere between 45 and 55 12 oz. bottles and caps should suffice for a five-gallon batch. As with all the other items that will touch your beer, it’s important for your bottles and caps to be sufficiently cleaned and sanitized. Here’s how Barnes sanitizes his bottles and caps: “I immerse them in PBW (cleaning solution) for half an hour or so. Then I rinse all the PBW off and either dunk each bottle in a Star San solution or spray them down with Star San.” As you’ll remember from the earlier parts, Star San is a miracle sanitizer that doesn’t require any rinsing, making it ideal for brewing. If you’re using a keg, remember to clean and sanitize that bad boy.
Related: How to Make Beer Part II: Brewing
Racking or Siphoning
Whether you’re transferring beer between fermenters or from the fermenter to your bottles, the best way to make the transfer is with an auto siphon and racking cane attached to a tube. You can also siphon the beer by sucking on one end of the tube, but keep in mind that the bacteria in your mouth might compromise the beer. Be sure to sanitize the auto siphon, racking cane, and tubing before use.
Filling and Capping the Bottles
Once you have your siphoning equipment set up, it’s time to start filling your bottles. One way to make the bottling process a lot easier is to put a bottle filler at the end of your tube. You could also get a special bottling bucket from The Homebrew Exchange and use a spigot and bottling wand to fill up your bottles until there’s about an inch of air left near the tops. Cap your bottles, then store them in a dark place that stays at around 70 degrees. After about two to three weeks, they should be ready to drink!
Kegging
If you’d rather not mess around with a bunch of bottles, you might consider investing in a homebrew (ball-lock or pin-lock) keg, CO2 system, and kegerator, which is a refrigerator that’s been adapted to hold and serve a keg. The right mini fridge can be adapted to fit two homebrew kegs. “I prefer kegging because it’s easier than cleaning and sanitizing a bunch of bottles, filling up a bunch of bottles, and capping all the bottles,” says Barnes. However, kegging comes with a few challenges of its own. You’ll need to hook the keg up to CO2, bleed off the airspace at the top of the keg, then keep the keg at a cool temperature so you can enjoy cold beer. Still, kegging is worth it once you invest in the proper equipment. After kegging your beer, you’ll need to wait for at least a week before consumption.
There is so much more to know about making beer — for help honing your process, consider entering homebrew competitions in your area and incorporating whatever feedback you receive. For now, we think our humble series should help you understand the basics of brewing so you can embark on a long, prosperous career as a homebrewer. We could write a part IV of this series, but we don’t think you need it — all you have to do now is invite a few pals over and drink up!


