
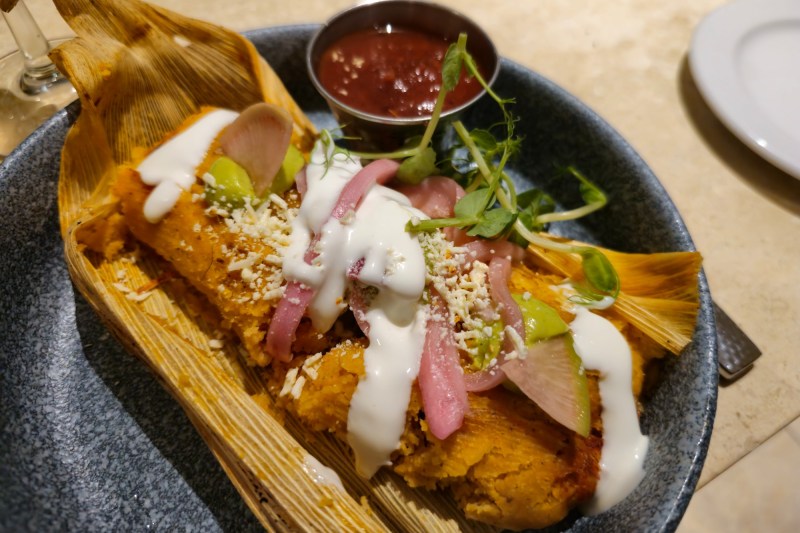
One of my go-to meals is tamales, and in my opinion, they are one of the tastiest and most popular dishes for a night out on the town, complete with a few frosty margaritas. But knowing how to reheat tamales is a must to retain that delicious first-bite flavor.
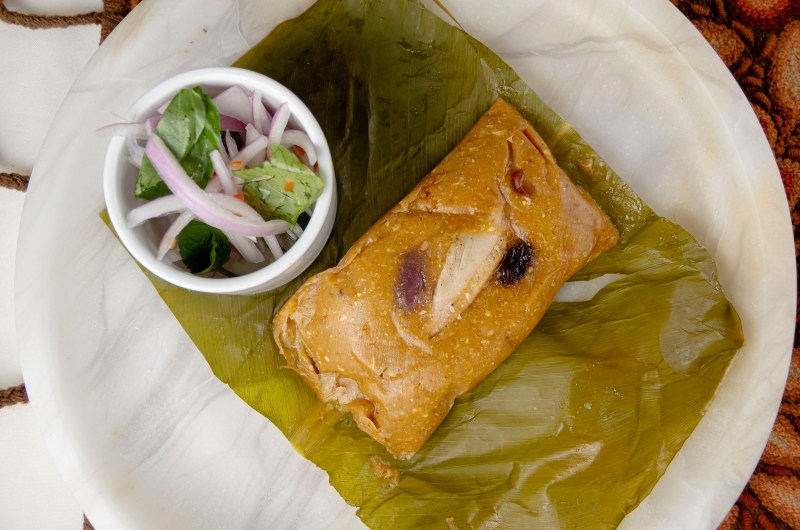
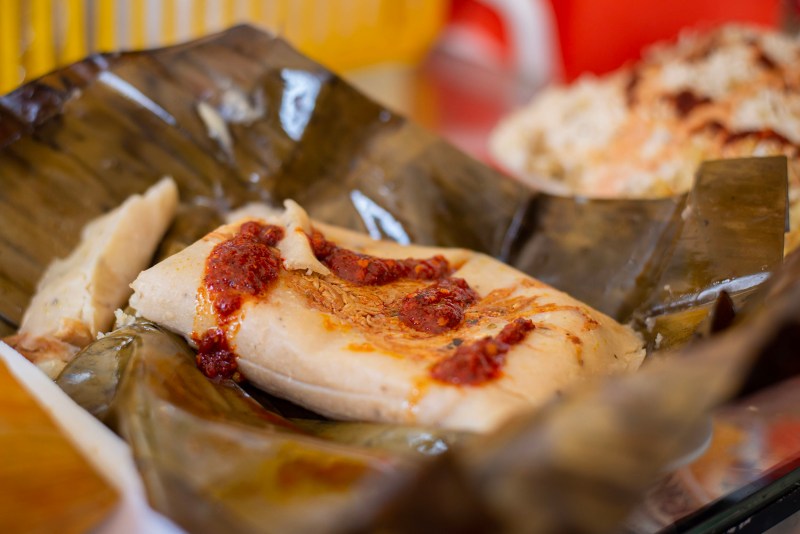
A traditional Mesoamerican dish, tamales are stuffed with meats or beans and cheese and wrapped in a banana leaf or a corn husk. Steamed and served with pico de gallo and rice, they make for a delightful dish that’s easy to make and packed with flavor and spice.
Tamales are easy to prepare and a great option to make ahead of time and reheat for a quick meal on the go. Whether homemade or store-bought meals, there are a few tips that I’ve discovered that you’ll want to know when reheating them so that you can savor all the goodness these little flavor pouches have to offer. If you wish to use a steamer, microwave, stove, oven, Instant Pot, or air fryer, here are the best ways to ensure you get the perfect hot tamale.
How to reheat tamales in a microwave
- Moisten the husks with cold water or wrap each in a damp paper towel.
- Place them on a microwave-safe plate while leaving space between them.
- Heat them for 1 to 2 minutes to warm them.
However, it’s vital to note that using a microwave is likely to dry your tamales. Steaming makes a better alternative in this case. Also, remember to thaw your frozen tamales in the refrigerator before reheating them in a microwave.
How to steam tamales using a cooking steamer
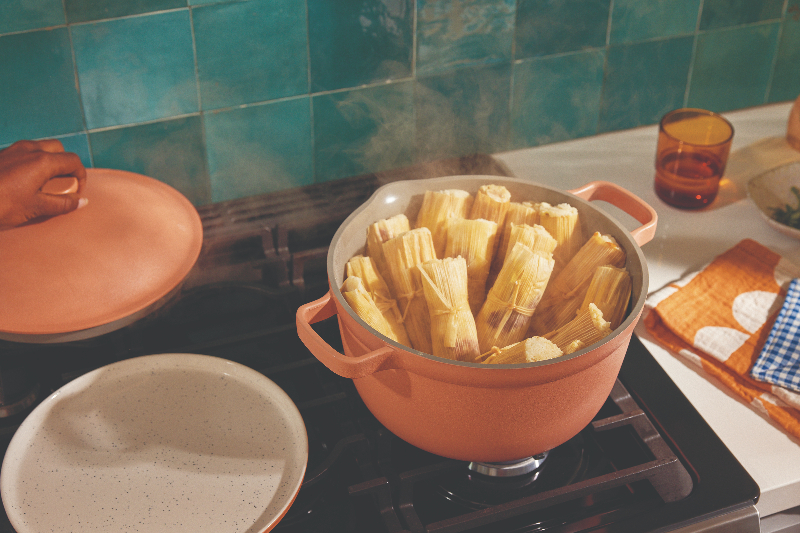
If you have a steamer, it is also an excellent option for reheating tamales. It keeps them from drying out or overcooking. Follow these steps:
- Fill the pot with 2 to 3 inches of water — make sure the water doesn’t touch the bottom of the steaming basket.
- Place the basket into the pot and cover it with a tight-fitting lid. Allow the water to boil.
- Once the water has boiled, use a pair of tongs to place your tamales in the basket.
- Cover the pot and reduce the heat to medium level.
Your tamales should be ready after 30 minutes of steaming. Refrigerated tamales take about 10 minutes less to reheat than frozen tamales.
Can you steam tamales the next day?
With tamales, you can prepare them ahead of time and store them in your refrigerator for up to one week or a couple of months in the freezer. As such, you can steam them the next day and enjoy them while hot. Remember to follow the steps provided above to use a steamer to reheat your tamales.
How to reheat tamales in an oven
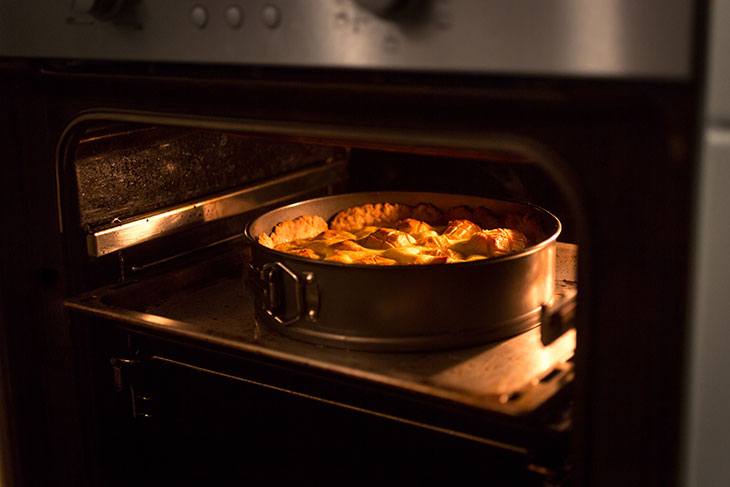
An oven is also a reliable alternative for reheating your cold tamales. Be sure to follow these simple steps:
- Preheat your oven to 325 degrees Fahrenheit.
- Wrap each tamale about two or three times with aluminum foil.
- Squeeze each tamale to remove trapped air.
- Place the tamales in an oven-safe dish or a sheet pan while leaving space between them.
- Place the dish in the oven and allow the tamales to heat for 20 minutes. If frozen, let them heat for 25 minutes.
Remember to flip your tamales at the 10-minute mark to ensure even heating. Be sure to use a meat thermometer to check your tamales’ temperature. They are ready to serve when at 165 degrees Fahrenheit.
How to reheat tamales on the stove
- Remove the husks from the tamales and dump them — you can’t have them on while using the stove to reheat your tamales.
- Add a teaspoon of olive oil or your favorite oil to a pan.
- Heat the pan for 2 to 3 minutes on medium heat.
- Place the tamales in the pan and cover it with a lid.
- Flip your tamales every 2 to 3 minutes.
It should take about 10 minutes for your tamales to heat — the exterior should be crispy and brown. This is the most involved option, but it delivers excellent results, letting you enjoy your tamales just the way you like them.
How to reheat tamales in an air fryer

As air fryers become more popular, people are discovering new ways to use them, and the answer to the question of if you can use one to reheat tamales is definitely. You can reheat your frozen or cold tamales in an air fryer, and here are the steps to follow:
- Heat the air fryer to a mid-range temperature.
- Moisten the wrappings or husks of your tamales with cold water.
- Place them in the fryer basket without overcrowding them and then heat them for 5 minutes.
Be careful when removing the tamales from the basket, as they could be hot. Using an air fryer is becoming a popular alternative for reheating tamales because it’s fast, easy, and healthy.
How to reheat tamales in an Instant Pot
If you’re looking for a quick and perfect way to reheat frozen tamales, turn to your trusty Instant Pot for a quick solution. In just minutes, you can have perfect, ready-to-eat hot tamales. Follow these steps to reheat your tamales:
Begin by heating your Instant Pot to the high setting.
- Moisten your tamales slightly and allow them to warm for approximately 10 minutes. Be sure to arrange them with ample space for thorough heating.
- Pour 1 cup of water into the Instant Pot’s insert pot.
- Position the tamales in the steamer basket, ideally standing them on their ends for optimal evenness.
Seal the Instant Pot’s lid and set the vent to the sealed position. - Once the designated steaming time is complete, perform a quick release of the pressure and carefully open the lid.
By following these steps, you’ll effortlessly bring the delicious flavors of your tamales back to life using your Instant Pot.
Reheating frozen tamales

It’s vital to note that reheating frozen tamales takes a little longer than refrigerated tamales. Whether you use a stove, steamer, or oven, be sure to add 5 to 10 more minutes to your reheating time. Overall, it will take about 20 to 30 minutes to reheat your tamales with whichever method you prefer.
For some people, a microwave might not be ideal for reheating frozen tamales — you’ll need to thaw them first. Alternatively, you can defrost your tamales in the microwave — just place them in a bowl and heat them for 3 minutes at a medium (50%) heat level.
Before eating your tamales, remember to check their temperature using a meat thermometer. This is particularly important if your tamales contain meat. According to the Food and Drug Administration (FDA), all reheated foods must be about 165 degrees Fahrenheit throughout.
If you need to store them for later, just pack them in Ziploc bags or airtight containers and put them in the refrigerator. When you have an appetite for one, just use any of the above methods to reheat your tamales for a quick and easy meal!
Make your own tamales
Now that we’ve covered all the ways you can reheat your tamales, we thought we’d give you a chance to make your own from scratch so you can always have a supply on hand.
Chef Billy Parasi is a classically trained chef with over 15 years of experience in the restaurant industry. His tamales are called rojos de pollo tamales, as they’re made with slow-cooked chicken in a red sauce. He calls tamales “the epitome of Mexican comfort food.” Parisi recommends making tamales with a few people so the process will move faster and be more fun.
Ingredients
For the filling:
- 4 1/2 pound chicken broken down into individual breasts, thighs, drums, and wings
- 6 tablespoons avocado or olive oil
- 2 peeled yellow onions cut into wedges or slices
- 16 garlic cloves
- 2 bay leaves
- 10 cups chicken stock, water, or vegetable stock
- 1 teaspoon cumin seeds
- 2 seeded ancho chiles
- 3 seeded guajillo chiles
- 5 Roma tomatoes, cut in half
- coarse sea salt and cracked pepper to taste
For the tamale dough:
- 40 to 50 corn husks
- 2 cups lard
- 6 cups finely found masa
- 1 tablespoon baking powder
- 1 teaspoon sea salt
- 4 cups chicken stock
Method
Filling:
- Season the chicken on all sides with salt and pepper.
- Add the avocado or olive oil to a rondeau pot over high heat until it smokes lightly. Place the chicken skin side down, then turn the heat to medium-high.
- Sear the chicken for 3 to 4 minutes per side or until well browned on both sides. Set it aside on a plate.
- Add 1 peeled yellow onion, 10 garlic cloves, and 2 bay leaves and saute for 3 to 4 minutes or until the onion is well browned. Pour in the chicken stock and season it with salt and pepper.
- Place the chicken back in the liquid and cover it over medium heat for 1 hour. Once the chicken is very tender, remove it from the liquid and set it to the side.
- Strain the chicken stock into a pot and set the liquid to the side. Add the onions and garlic from the strainer to the plate with the cooked chicken.
- Add the rondeau pot back to the burner over high heat and then add 3 tablespoons of avocado or olive oil, and heat until it begins to smoke lightly.
- Add the onions and saute for 5 to 6 minutes or until well browned. Stir in the garlic and cook just until it’s fragrant, about 30 to 45 seconds.
- Sprinkle in the cumin and toast for 1 to 2 minutes before adding the chiles and tomatoes. Saute the vegetables for 2 to 3 minutes, and then add back half of the strained chicken stock. Simmer over medium heat for 10 to 15 minutes or until the chiles are softened.
- While the pot simmers, bone, skin, and shred the chicken with your fingers or forks and set aside. Transfer the mixture from the pot to a blender and blend on high speed until it is smooth.
- Pour the red sauce back into the pot, adjust the seasonings with salt and pepper, and the shredded chicken and mix to combine. Remove it from the heat and set it aside to cool.
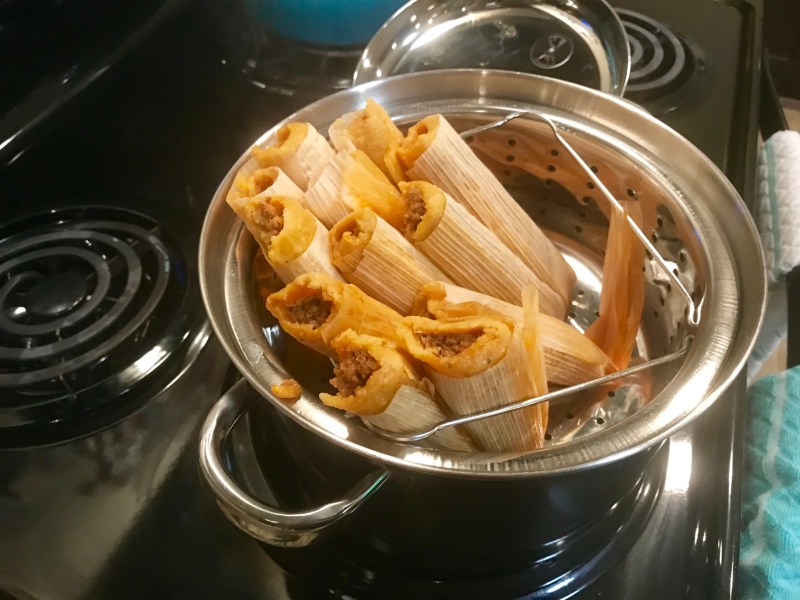
Tamales:
- Add the husks to a large container, cover it completely with cold water, and let it sit overnight. You can also cover it in hot boiling water and let it sit for 1 hour to soften. Strain the husks entirely and set them aside.
- Add the lard to a stand mixer with the whisk attachment and mix on high speed for 5 to 7 minutes or until it becomes light and fluffy.
- Stop the mixer and then add in the masa, baking powder, and salt, and mix on low speed.
- While it’s mixing, slowly pour in the remaining warm 4 cups of chicken stock until it is mixed in. You may need to wait a minute or two between adding the chicken stock to ensure it is mixed.
- Once the dough is combined, it should be very soft and slightly sticky, like the consistency of peanut butter.
- Take about a 1/2 cup of masa dough and spread it to the center of a husk, making it about 5 x 5 inches in size. Be sure to leave about 1 inch at the top and several inches on the bottom parts of the husk.
- Add about 2 tablespoons of the chicken filling to the center of the masa that is spread out on the husk.
- Fold the husk over until the masa completely encases the filling. Next, fold the husk over one more time and then fold the bottom part of the husk up. This is optional, but you can tie a thin piece of husk around the tamale to help it hold in place, although it will hold fine and is unnecessary.
- Place the tamales open side up into a steamer basket until it is filled up. Put a damp kitchen towel over the tamales and place them in a large pot with water below the basket and cover with a lid, and steam for 1 hour to 1 hour and 15 minutes or until cooked through.
- Remove and rest for a few minutes before serving.


