These days, more skiers and snowboarders are venturing far beyond official ski resort boundaries than ever before. With the explosion in popularity of backcountry skiing, so-called off-piste exploration has opened a new winter playground for a growing number of riders. But there’s a world of difference between carving a groomed trail and bombing the wild, unmarked backcountry.
From exiting a resort boundary gate to skinning up from a trailhead, backcountry skiing requires a different mindset and a new set of skills and tools than your typical day at the resort. If you’re planning on hitting your first powder stash, now’s the time to plan your out-of-bounds tool kit and learn some essential backcountry skiing skills.
If you’re new to the club, it’s also important to understand the additional risks inherent to backcountry skiing and plan accordingly. Here are a few points to consider, followed by our five-step guide to the gear, knowledge, and tips you need to do so safely.
What is backcountry skiing?
First, it might be helpful to define what we mean when we say “backcountry skiing.” At its core, backcountry skiing — also known as “off-piste skiing” — means any skiing that’s done outside the patrolled boundaries of a ski resort or other official ski facility.
How hard is backcountry skiing?
Because backcountry skiing often involves getting back up the mountain under your own power, it typically requires a higher level of fitness. Anyone who is reasonably fit with at least an intermediate level of skill with downhill skiing can likely enjoy a modest backcountry ski outing.
Can you backcountry ski with regular skis and equipment?
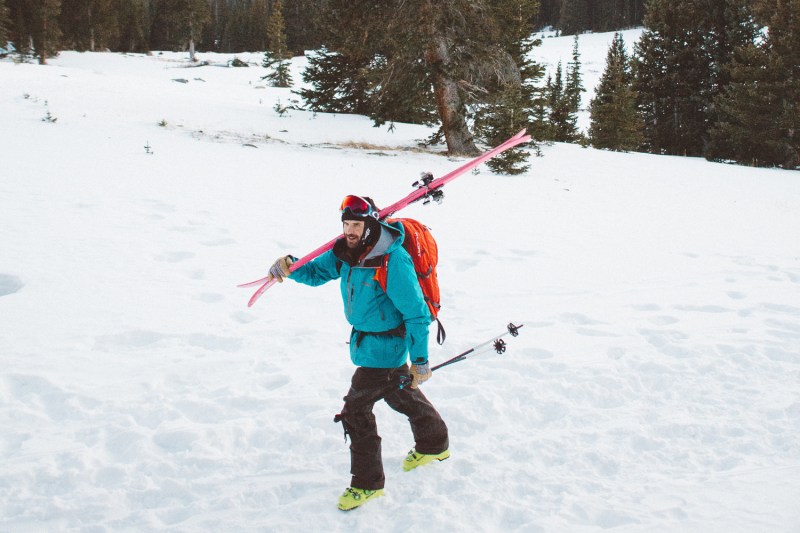
Almost any “normal” skis will work in the backcountry. The key is having boots and bindings with the flexibility to lift your heel (known as “skinning”), so you can walk uphill, then clip back into your bindings when you’re ready to descend.

Step 1: Assess your abilities before hitting the backcountry
Before planning your first backcountry ski outing, take a second to assess your skills and fitness level. You needn’t be a triathlete or an Olympic-level skier to start riding off-piste. But, be honest with yourself. A good rule of thumb is that you should at least feel confident skiing a range of intermediate (blue square) trails at your nearest resort. If you need to brush up on your technical skills, consider an advanced lesson with a professional instructor. Share your backcountry aspirations with them so they can provide tailored lessons to help you achieve your goals.
Take stock of your navigation and self-rescue abilities, too. In the backcountry, there is no ski patrol, no lodge staff, and (probably) no fellow skiers to help if things suddenly go sideways. Prepare to be self-reliant. Understand all the risks going in, double-check your gear, and be sure to let a friend or family member know where you’re headed each morning and when you expect to return.

Step 2: Get educated in backcountry skiing and safety
Every outdoor adventure carries inherent risks. These include everything from wildlife encounters to personal injury to faulty gear to dangerous weather. Backcountry skiers need to be prepared for all these and more. The most significant risk for off-trail skiers, however, is avalanches. By the numbers, the good news is that most skiers are unlikely to encounter a deadly avalanche. Still, it’s essential to understand how they work, when they’re most likely to happen, and what you can do should you find yourself buried in one. This video is an excellent primer:
Commit the simple acronym ALP TRUTh to memory as a “cheat sheet” of avalanche warning signs to look for before heading into the backcountry:
- Avalanche: Has there been avalanche activity on your chosen slope or similar ones in the last 48 hours?
- Loading: Has there been significant snow, rain, or wind that could have added extra weight to a weak layer recently?
- Path: Is there a noticeable path that a potential avalanche could take?
- Terrain Trap: Are there features on the terrain you’re skiing, like cliffs, gullies, or trees, that could make the consequences of getting caught more dangerous?
- Rating: What was the danger rating of today’s avalanche forecast? (More on this below.)
- Unstable Snow: Have you seen or heard signs of instability? Cracks that propagate in the snow, collapsing snow, or a “whoomphing” sound (yes, unstable snow makes a distinguishable whoomph when it shifts) can signal danger.
- Thaw: Have the temperatures recently led to a melting event?
But, frankly, internet research alone won’t cut it here. It’s worth investing in an avalanche preparedness course to understand better how avalanches happen and the risks of skiing in avalanche country. The gold standard is the American Avalanche Association’s Recreation Track. This includes a level 1 course that focuses on decision-making for backcountry skiers in avalanche terrain. In the companion Avalanche Rescue course, skiers can learn rescue basics, including how to use a transceiver, probe, and shovel to find and rescue avalanche victims. Alternatively, REI offers a catalog of excellent snowsports-related courses (many for free), including backcountry skiing and avalanche preparedness.
More on the transceiver, probe, and shovel – plus other nice-haves
Let’s get into detail on the three must-haves and learn more about the nice-to-haves when it comes to avalanche preparedness. The avalanche transceiver (or beacon) is a device that emits a signal that other avalanche transceivers can pick up, which makes it easier to find someone buried in an avalanche. The avalanche probe is a long and collapsible pole used to probe the snowpack for buried victims. And finally, an avalanche shovel is used to dig through the snowpack to rescue anyone who is buried.
Here’s a list of other things that are nice to have in the event of an avalanche.
- Avalanche airbag pack: A backpack with an inflatable airbag that can help keep the wearer afloat in an avalanche.
- Snow saw: Used to cut blocks of snow for snow stability tests and to excavate around buried victims.
- Snow study kit: Tools used to assess the snowpack stability.

Step 3: Gear up with the right kit for backcountry skiing
After assessing your skills and fitness and passing a crash course in avalanche preparedness, it’s time to gear up. Take stock of what you already own and what resort-friendly gear could also be used in the backcountry. If you’re an avid skier, you probably already have a selection of these in your closet:
- Ski jacket
- Ski pants
- Skis
- Ski boots
- Ski bindings
Make a list of any new backcountry gear you need to buy. Backcountry skiing requires some additional essentials. While the exact nature and need for these pieces are worth covering in a separate detailed post, be sure to pack these at a minimum:
- Ski helmet
- Skins
- Avalanche beacon
- Probe
- Snow shovel
- Ski backpack

Step 4: Plan your first backcountry ski tour
Planning your first backcountry ski trip is fun, exciting, and maybe a little overwhelming. The first rule: Never venture into the backcountry alone. Like scuba diving and drinking (no, not at the same time), backcountry skiing is safer and more fun with a buddy. Reach out to friends or through online forums to find someone or a group willing to take you under their wing and show you the ropes. Ideally, your companions should be more skilled than you. Of course, be sure to let them know you’re a beginner so that you and they can plan accordingly.
Going with a professional ski guide is another option. It can save you time, keep you safe, and get you into the best powder stashes. Lots of websites list guided trips with ratings and reviews. One of our favorites is the 57Hours app because it thoroughly vets the guides and trip providers listed. The app makes it easy to search for any kind of mountain trip around the United States and Canada’s west coast. Ask the guide questions about the trip and book in a couple of clicks once you find the right one for you.

Step 5: Check the weather forecast before hitting the backcountry
The morning of every backcountry ski run, the first and last thing you should do is check the weather forecast for extreme weather conditions like heavy snow or freezing rain. For backcountry skiers, it’s also vital to check Avalanche.org. The site is sponsored by the American Avalanche Association and Backcountry Access and serves as an aggregator for avalanche forecasting around the country. Get familiar with the five-category North American Public Avalanche Danger Scale, which ranks the current threat level on a scale from Low (1) to Extreme (5).

Check both forecasts regularly. Whether you’re skiing at the resort, hitting up a secret pow stash, or stuck in the office, these forecast tools keep you updated on snow safety. More importantly, reviewing snow conditions can reveal a picture of how the snowpack is evolving throughout the season. Knowing there is a dangerous layer of snow from a few weeks ago that is still factoring into danger ratings is essential knowledge when you step into your bindings.


