Ever since Prometheus stole fire from the gods of Mount Olympus and bequeathed it to humans, we’ve used it to ward off predators, to cook our meat (thereby enlarging our brains), and for light. Over the years, The Manual has offered more than a few tips and tricks on how to build a fire both out on the trail and at home. We’ve condensed and collated this information down to one handy guide that teaches you how to build the perfect fire in a fireplace and campfire in the great outdoors, including tips for working in the rain and without matches. With everything you need to get your fire roaring, consider this your go-to guide for when you’re ready to light it up anywhere and for any reason.
Learn how to build the perfect fire in a fireplace and a campfire in the great outdoors. We’ve included tips for working in the rain and without matches. Consider this your go-to guide for when you’re ready to light it up anywhere and for any reason.
How to build a fire in the fireplace
You’ve likely heard that old cliche, “Keep the home fires burning.” Well, you first have to start your home fires before you can keep them burning. Though we live in a world of gas furnaces and cooktops, a modern man would do well to learn how to start a fire.
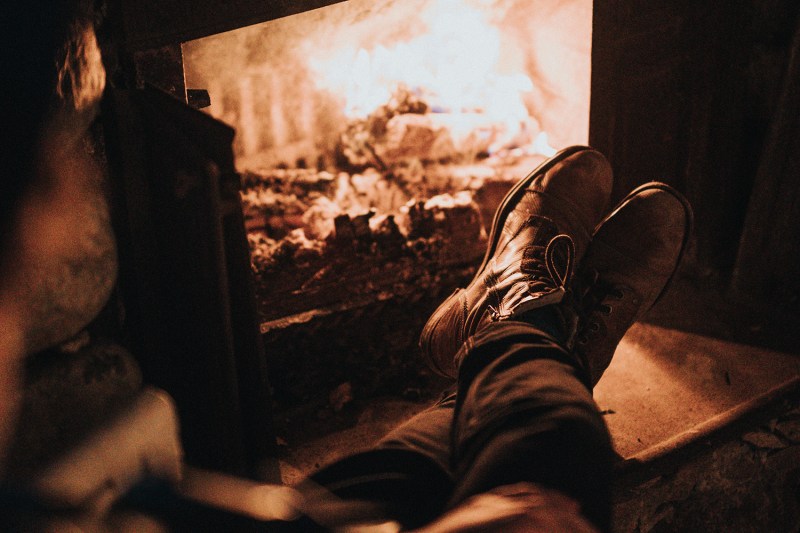
Whether you’re looking to woo a potential lover or enjoy a quiet night of reading, a crackling fireplace can warm your body, heart, and soul. The primal dancing of the flames is at once soothing and exhilarating. While building a fire in a fireplace is relatively easy, a few simple tricks can hasten the fire-building process and prevent you from making a fool of yourself.
- First, it’s a good idea to use your fireplace shovel to clear away the ashes from your previous fire.
- You must open the flue or damper. There should be some sort of chain or handle near or inside your fireplace.
- Place two large, dry, and split logs parallel to each other inside your fireplace. The idea is to create a sort of “nest” wherein you can start your fire.
- Twist some newspaper and arrange it in a nest between the two logs. If you have a steel grate, you can shove some newspaper beneath the grate.
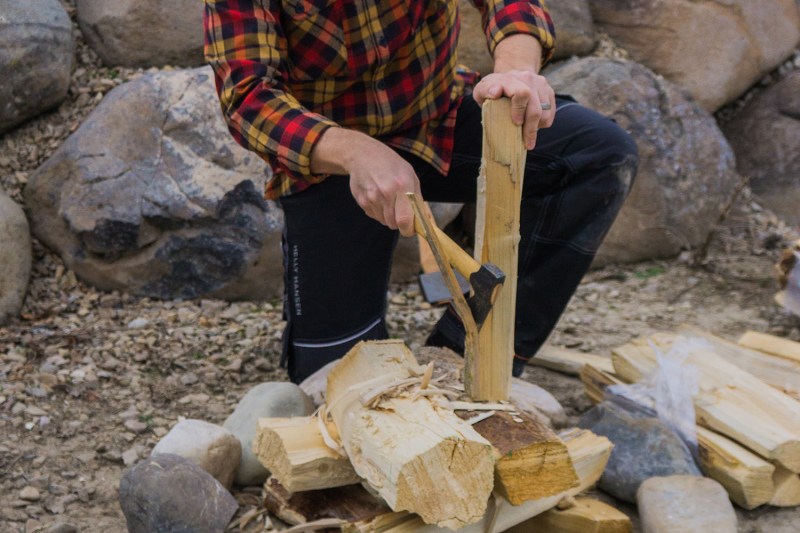
- Place your smallest kindling on top of the newspaper, then place larger pieces of kindling on top of the two parallel logs, creating a bridge of sorts. If you don’t have any small kindling, consider splitting it with a hatchet.
- Make sure you allow some space between the pieces of wood, as ventilation is important for delivering oxygen to the fire.
- If you’re having trouble with downdraft, ignite a piece of newspaper and hold it up to the flue opening. This is called “priming the flue.” The hot air will help reverse the direction of your chimney’s draft, preventing it from blowing down your chimney and into your home. You may need to do this a few times to ensure that the draft is going in the proper direction. Opening a door or window while you build your fire will further stabilize the air pressure and encourage an updraft.
- Ignite the newspaper nest in multiple spots and watch your fire burn. If the logs are properly seasoned, this arrangement should be enough to get your fire going.
- Add new logs to the fire as needed. Put them on in a perpendicular fashion, like you’re building a log cabin.
Note: Resist the urge to use gasoline or some other combustible liquid when starting a fire in a fireplace. Not only is this extremely dangerous, but it’s also basically cheating.
How to build a campfire
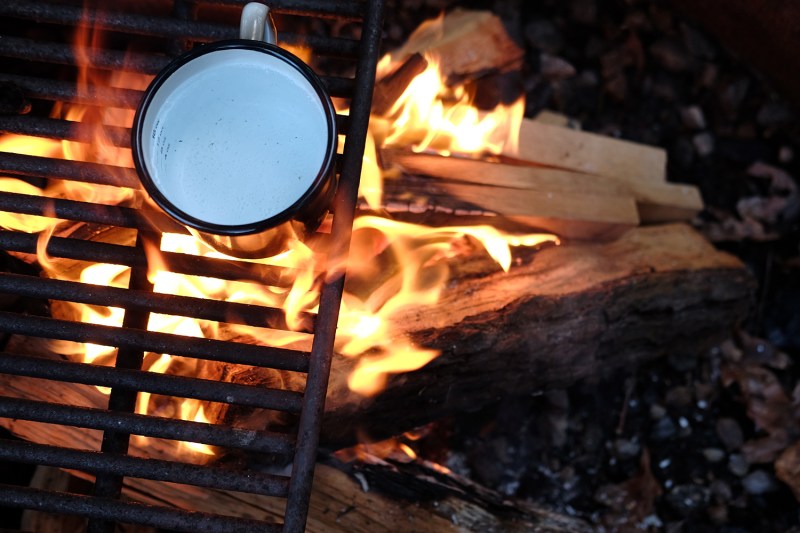
There’s something about getting a fire started in the wilderness that’s satisfying on the most primal levels. When you’re out for a week of backpacking, that fire may be your most technological tie to civilization for miles. Getting a fire started though, takes more knowledge than just stacking some wood and sticking a lit match near it. If you’re planning on cooking over your flames, then you’ve got to do even more planning. We tested a few different preparation methods to find the best options for every campsite. Next time you’re getting ready to heat up some fireside coffee or grill the catch of the day, you can do it over the perfect campfire.
Tinder and kindling
A roaring campfire doesn’t start out ready to eat huge logs; you’ve got to build it from a few sparks and keep it well tended to get that hot bed of coals. Selecting tinder can be as simple as pulling some dried bark off a dead tree (if one is around). However, we prefer to leave nothing to chance, so we always bring our own.
- 1. You can also create kindling by “shaving” down larger pieces of wood.
- 2. Kindling, which is tucked under your firewood, is an essential fire-building ingredient.
For the more DIY inclined, take a look at your dryer lint at home. A handful of that stuff with a couple drops of hand sanitizer will also light up incredibly fast, and will definitely score you a few mountain-man points with your buddies who were less prepared.
Now that you’ve got your fire-starting gear, it’s time to prepare your fire pit. What are the goals? We’ve tested four different ways to set up your wood and get things burning, so whether you’re looking to build that perfect bed of coals for marshmallows, or have eyebrow singeing flames, we’ve got you covered.
Types of campfires
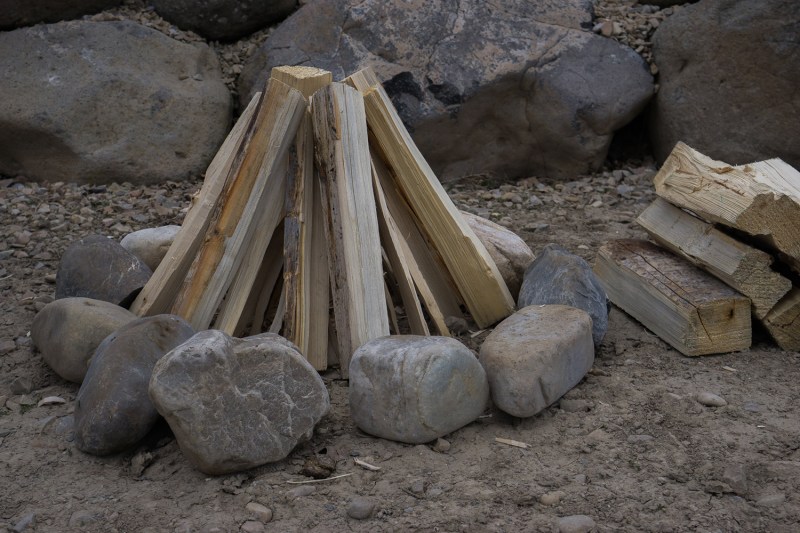
Tipi fire
The tipi is your basic fire that every Boy Scout learned how to light. It’s also the foundation to get the others we’ll show you started. It looks just like it sounds. Lean your wood together to shape it into a Native American-style tipi, leaving plenty of room for air and your matches. You can scale a tipi fire from the small kindling and tinder starter core all the way to massive bonfires and everything in between. We prefer to build the small kindling tipi and then build an outer one of larger wood around it to get things burning quickly. The tipi is perfect when you need even heating and light quickly.
Lean-to fire
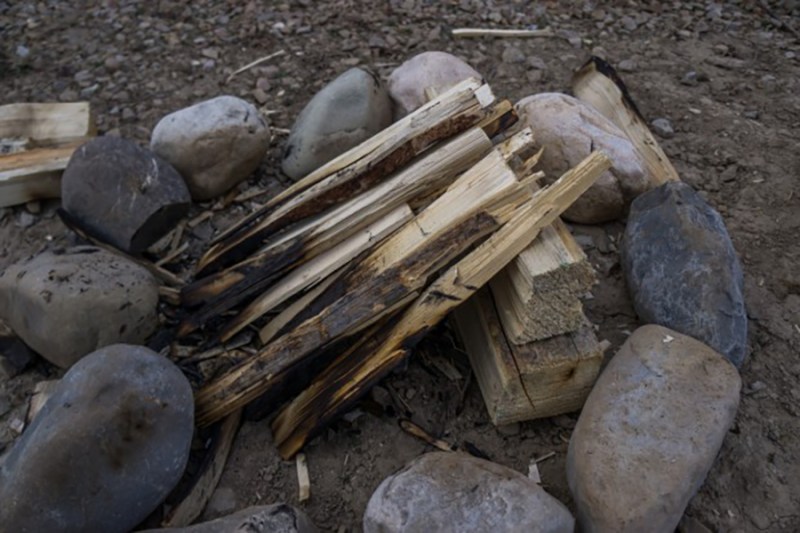
When things are hard to start because of wind or dampness, the lean-to is your go-to fire. Start by building a windbreak out of a few of your larger sticks and logs. Get your mini tipi set up on the leeward side, and then lay longer sticks out above your core fire, stacked on the windbreak. This will allow your small starter fire to breathe without getting blown out. When it is finally exhausted of smaller fuel, it will be strong enough to start burning some of the larger sticks in the lean-to and will stand up to the wind and weather. An added bonus of this fire is that your windbreak will serve as a good heat reflector so it is a good option for cooking.
Star fire
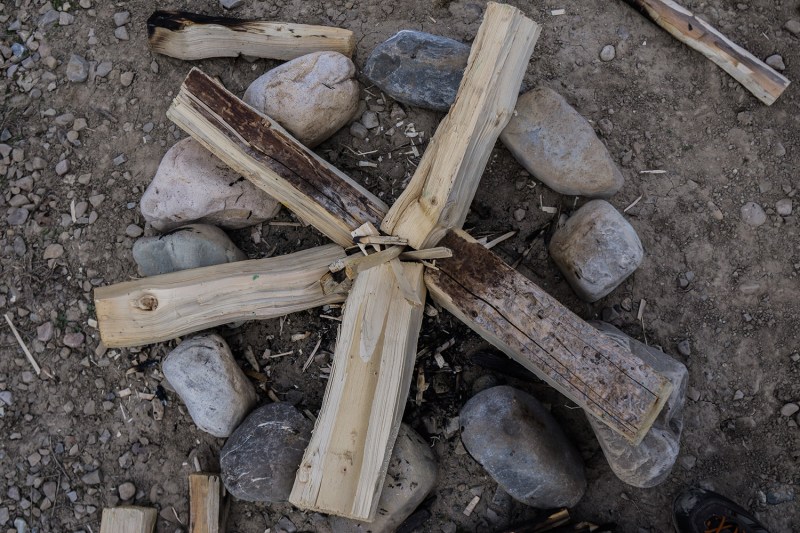
If you’re looking for a fire that will slowly burn through the night with little maintenance, look no further. To get things started, fire up your mini-tipi again and then insert larger split logs in a five-point star. The fire will burn outwards, so all you have to do to keep it nice and compact is slowly feed your logs into the flames. If you’re working with a campsite or backyard fire pit, this is definitely your best choice, as you can let the logs just slide down into the center as they burn down.
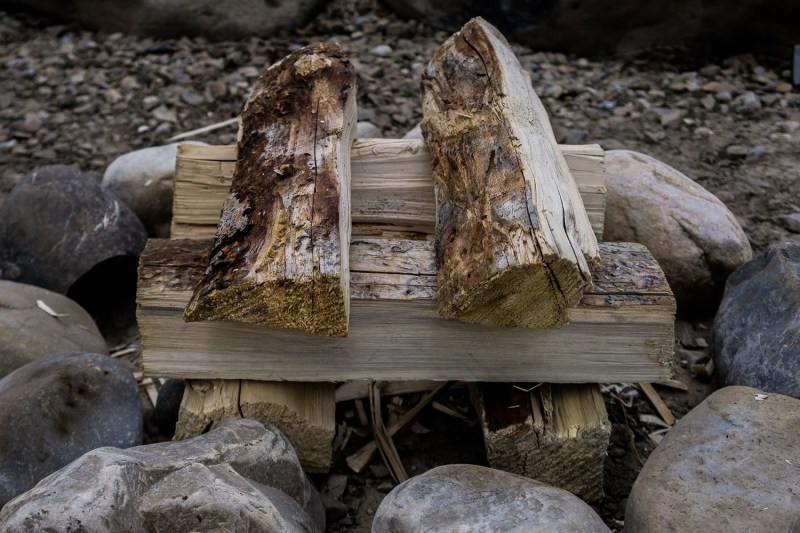
Log cabin fire
Due it its symmetry when built well, this is your choice to get a perfect bed of coals to roast marshmallows, hot dogs, and tin-foil dinners. When you’ve got your kindling tipi built, start stacking larger logs on either side, alternating like an old Lincoln Logs kit. When lit from the bottom up, it will create an excellent bed of hot coals for cooking. Alternatively, you can build it like more of a pyramid, stacking the largest logs on the bottom and then building our core tipi at the very top. This fire will slowly burn down the pyramid evenly.

How to build a campfire without matches
Building a fire in the wilderness is tricky, especially if you don’t have matches. However, it’ll make you feel like a champion of the elements. The next time you’re stuck in the woods with nothing more than your knife and a palpable sense of fear, keep the following method in mind. If it seems familiar, that’s because it’s the method of choice for the Boy Scouts of America.
- First, you will need to find tinder — light, fluffy material that burns very easily. Dry grass and wood shavings whittled from a stick will do the trick. You can also use moss or pocket lint. In a pinch, you can use your knife to scrape lint from your clothes.
- Next, you should collect dry wood pieces of all sizes. This includes small, toothpick-sized twigs.
- Make a nest out of your tinder. You will use this later to turn a tiny coal into roaring flames.
- Prepare your main fire. Make another tinder nest at the base, then stack progressively larger pieces of kindling around it, forming a tipi shape. Be sure to leave a hole in the side of your wood pile so you can add the smoldering coal when the time is right.
- Create a bow out of a strong, slightly bent stick. You can do this by tying a piece of string or even a shoelace to either end. You might need to notch the stick so your string stays in place.
- Find or whittle a cylindrical piece of hardwood to use as your drill. In his book, How to Stay Alive in the Woods, legendary survivalist Bradford Angier writes, “The drill may well be a straight and well-seasoned stick from one-fourth to three-fourths inch in diameter and some 12 to 15 inches across.” Make one end of the drill slightly pointed so it will fit in your socket.
- Look for a piece of wood or rock to use as a socket. It should be about the size of your fist. If you can’t find a piece of stone with a dimple in it, consider carving a hole into a piece of wood.
- Set aside a dry, flat piece of wood to use as your fire board and carve a small hole about one inch from the edge.
- Carve a U or V-shaped “chimney” into the fireboard near the hole that you just carved.
- Place a “coal catcher” beneath the chimney so you can catch the coal you’re about to make. A leaf or a flat piece of bark can make a fine coal catcher.
- Wrap the string of your bow once around your drill. Make sure the pointy end is pointing toward the socket and the blunt end is against the fireboard. You can use resin to lubricate the connection between the socket and the drill.
- Next, heed the words of our friend Bradford Angier: “The tinder is bedded under the slot in the fire board. If you’re right-handed, you kneel on your right knee and place the left foot as solidly as possible on the fire board.” Start sawing the bow back and forth with your dominant hand. If you’re doing it right, the drill will start spinning, creating friction with the fire board.
- Continue to saw, increasing your speed as you go. Angier recommends that you “press down on the drill, but not enough to slow it.” You’ll eventually see smoke rising from the bottom of the drill and a black powder called “punk” collecting in the chimney.
- Angier writes, “Hot black powder will begin to be ground out into the tinder. Keep on drilling, for the heartier a spark you can start glowing there, the quicker you’ll be able to blow it into the flame.” Transfer the coal from your coal-catcher to the tinder nest. Blow gently until the coal catches the tinder on fire, then add the flaming nest to the base of your preassembled wood tipi.
Note: If you’re looking for a slightly simpler means of starting a fire, you could forgo the bow and spin the drill using your hands. However, this may end up taking more time and effort in the long run
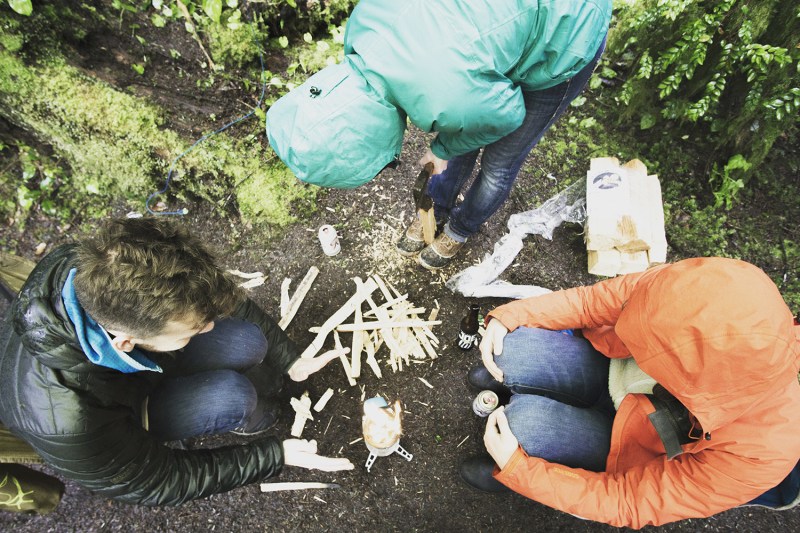
How to build a fire in the rain
You can’t have a great camping trip or cookout without fire and you might not survive a night spent lost in the dark, merciless forest as torrents of rain ceaselessly pour from the heavens without the life-giving warmth of a steady blaze. That’s right, kids, you can be afflicted by hypothermia even in the middle of the summer — in fact, more cases of hypothermia-stricken hikers and campers occur in the summer than during the colder months, though the figures are skewed by the fact that so many more people are outdoors in the warmer seasons.
Whether you’re warding off the icy grip of death, looking for the comfort and companionship a blaze can bring, or you just want to cook the bass you caught, you can indeed make a fire even in the rain. And if you build it big enough, your fire will keep on burning even in a downpour. All you’ll need is extra patience, a prepared location, the right tinder, painstakingly gathered combustible materials, and of course a source of flame.
Let me be clear on one thing from the get-go: If you get caught in a rain storm without so much as matches, a lighter, or a way to make sparks, then you probably can’t start a fire in the rain. Friction-based fire starting is hard enough in the driest conditions, so consider movement to stay warm if you can’t even make so much as a spark with ease.
Establish a dry(ish) working area
If you have a tarp, rig it up covering as large an area as possible; if you have no tarp, find an area overhung by boughs or, in a perfect world, a rocky outcropping. (Don’t be afraid to lop a few limbs off a pine tree to create a safe spot for your fire; the tree will survive, and without fire, your survival might not be so certain.) Even though a hot enough fire can burn in the rain, all the better if you can keep direct rain off of your fire; just be mindful of how high the flames may reach when choosing the “ceiling” under which you’ll make the blaze.
If you have a tent, store and work with your wood, twigs, and tinder inside your tent (don’t worry, the fire will be lit outside the tent). No tent, keep your smallest, driest tinder tucked into your pockets, jacket, or shirt. Use strips of bark or layered logs to create an area elevated off the ground. Dry rocks, if you can find them (simply flipping larger rocks over may work if the ground is not saturated) can help create a platform as well.
If possible, create a windbreak, too. This can be done using naturally occurring features, like downed trees, rock piles, etc., or you can create your own windbreak with tarps, logs, rocks, or any combination of these and other materials. A good windbreak can protect your fragile fire from gusts and can block rain blown in sideways.
Collect as much tinder as you can
Evergreen trees provide far and away the most abundant, easy-to-find source of tinder in rainy conditions. Chances are good that you’ll be able to find dry twigs and smaller branches attached to and/or underneath most pine trees even after days of rain. Barring that, you should be able to shave thin layers of bark off said twigs to create dry tinder. You can gather stringy plant fibers from trees like the cedar or birch, but note that most pine needles and leaves make poor tinder, even when dry. (A large quantity of long, bone-dry needles, such as from a lodgepole pine, are an exception. Also, many types of sap burn very hot for a few seconds and can act as an accelerant.) Also, don’t forget to check your belongings for scraps of paper, cloth fibers, or even those fire starters you packed.
Don’t just find dry wood, make it
In rainy conditions, you can burn up untold amounts of time searching in vain for dry wood. Instead, spend time trying to crack various medium-sized sticks you find, checking the interior of each split piece of wood for dryness. If you can find enough wood that’s largely dry inside, you have found the wood you need. You can use a pair of trees for leverage to help break sticks and small logs into a useful size, and then split them lengthwise using a hatchet, knife, or by exploiting an existing crack in a section of wood by forcing a rock or stick down through it like a wedge. It can take a while, and it’s not much fun. Sorry.
If you find dry-ish wood that’s too hard to break and seems too long to use in a fire as-is, no problem! Just plan to stick the long branches into the blaze and keep inching them in more and more as the are consumed. This is also true for wood that is dry on one half but wet on the other; it will dry as it draws closer to the flames.
Building the fire
Unless you’re an expert fire master, don’t try to construct an all-in-one fire, meaning a fire with the tinder at the bottom ready to catch, flare up, and ignite the well-prepared array of larger wood stacked above and around it. Instead, build a fire using a tipi or log cabin design and put plenty of good tinder underneath the larger sticks and logs, but don’t plan on using that tinder first. Instead, concentrate on a separate pile of tinder which you can actively work with and then add to the fire once you have it reliably caught.
One great way to do this is to create a tinder pile or “bundle” on top of a piece of bark (sheets of birch bark are ideal) or a bed of twigs. That way, you can easily move your nascent flames once they’re caught. Using a fire bundle like this could even permit you to try to start the fire inside a tent or under an overhang that would be otherwise unacceptable for a larger fire.
Focus on getting a single point of the tinder caught by concentrating the flame of a match or lighter on it, or by sending all your spark showers in the same place. If your tinder is dry and fine enough, the heat and flame will soon spread throughout it, so don’t worry about lighting it at multiple points. Slowly coax the flame to grow and warm with gentle breaths, then, once you have licking flames, gently add the burning tinder to the waiting tinder underneath your fire.
Now give it time. Adding too much fuel to a fledgling fire is a great way to smother it. But as soon as the flames are really licking, continuously add ever larger fuel until that baby is blazing hot. The bigger, hotter coal bed you can create, the better chance you have of a sustainable fire, rain be damned.
Note: In case you haven’t already heard this (and if you have, it bears repeating), as soon as you think you have enough fuel to keep your fire going all night, triple your stockpile. Some even say get five times as much wood as you first thought sufficient. With that done, you might just enjoy a fire throughout the evening.

Safety tips when building fires
We can’t leave without providing some safety tips when building a fire. Here are some things to keep in mind when building fires:
- Always build a fire in a safe location.
- Never build a fire near dry leaves or grass.
- Be sure to have a way to put the fire out completely, such as water or dirt.
- Never leave a fire unattended.
- Be sure to extinguish the fire completely before leaving the area.
Now you know how to build a fire, the difference between a few types of fires, and tips whenever you are building fires.
