When you first learned how to snowboard, chances are you picked up your board from the rental shop, they asked you a few questions that you weren’t totally sure of the answers to, and then you went off to learn how to snowboard — or to fall over on the mountain for a day. It’s different now. You’ve bought your own snowboard. You’re fully decked out and ready for the winter season. But your new bindings are still sitting alongside your pristine snowboard, waiting to be attached.
Whatever your snowboarding level, you can always benefit from a little ride optimization. Setting your snowboard stance correctly should be at the top of any list of snowboarding tips — or perhaps second, under finding a well-fitted pair of snowboard boots. Your stance underpins every move you make on the board. It amplifies your riding style. It sets you up for shredding powder, ripping groomers, or sending it big in the park. But first, you need to understand the difference between regular and goofy, get ride angles, stance width, and more. We’re here to help you get set up.
What do we mean by stance?
Before we get to how to set your stance, let’s define exactly what stance means in snowboarding terms. Simply put, stance is not the positioning of your body while you ride, but it refers to the distance between your front foot and your back foot. One thing we won’t tell you is what is a “perfect” stance because we can’t. Every snowboarder has a different stance that works for them, because it really depends on your riding style. What might be the perfect stance for your riding buddy doesn’t work for you. The “perfect” stance for any snowboarder is the one that they feel most comfortable in.
Regular or goofy
Unless you’re unusually ambidextrous, you will have a preference for which foot you have forwards when you ride. Regular riders prefer left-foot-forward riding, while goofy riders ride right-foot forward. It doesn’t matter which you prefer, but it does matter that you know. Sure, it’s great to learn to ride switch — this is when you ride with your usual back foot facing forward — but you should probably save this for deliberate efforts.
A lot of snowboarders naturally have a feel for which foot they would prefer pointing forwards. Just imagine yourself cruising down a groomer. Really close your eyes and imagine it. Which foot feels more natural to have ahead of the other? If you’re still not sure, there’s a simple test.
Stand in a comfortable position, with your feet shoulder-width apart. Have a friend push you gently from behind, hard enough that you fall forward, but not hard enough that you hit the ground. As you fall, you’ll step to catch yourself. Whichever foot you catch yourself with is usually — but not always — your preferred forward foot. Once you know how you ride, you can set up your board so that your chosen front foot is towards the nose of the snowboard.
Stance width
If you stand with your legs straight and try to squat, it’s hard to get down. Equally, if you have a go at squatting with your feet too far apart, you feel like a sumo wrestler and struggle to get back up. As snowboarding is a dynamic sport, you are continually driving through your legs into a half-squat and back up as you move through the turn. Your stance width directly affects your fluidity through this motion, as well as your balance and how you can shift your body weight.
Most people choose to have a stance that sees their feet just a little wider than shoulder width. Park riders often go a little wider for balance and to suck up impacts off jumps, while riders who like to carve the corduroy often go a little narrower for more lean. If you’re riding groomers, you want to set your stance in a neutral position between the nose and tail of the snowboard. If you’re riding deep pow, you might want to move your whole setup back a couple of notches — remember to move your front and rear binding back equal amounts.
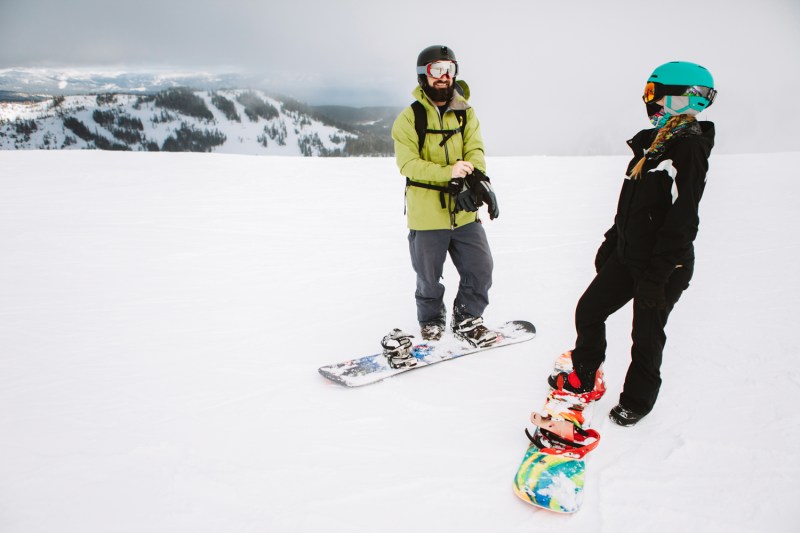
Set your stance
One of the key issues that beginners face when they start snowboarding is that they don’t think of their legs as being separate entities. Carving turns are initiated from your front foot, while skid turns and speed scrubbing come from your rear leg. The leg separation starts from your setup, too. No matter what you do, your front foot should always be positioned positively — slightly turned towards the nose of your board.
Binding pucks are marked with degree increments — usually of 3 degrees at a time — and you can use these to make minor adjustments. Most riders would choose to have their front foot between +15 degrees and +21 degrees, with aggressive carvers usually opting for a higher angle. Then there are three choices when it comes to setting up your rear binding.
Positive/positive
Setting your rear binding to a positive stance (pointing towards the nose of your board) is popular with directional snowboarders. These sorts are usually those riding steep backcountry powder, narrow runs, or carving long turns on the groomers. The directional setup keeps your knees in a strong position while you have your body in a directional pose. Beginners can find this stance less stable than having a more neutral back foot, and if you want to ride switch, this will put your back knee in an uncomfortable position.
Positive/zero
Most riders choose to keep their rear foot at zero degrees — pointing straight across the board. This gives you a good balance of comfort and balance but allows you to ride hard directionally while still having the option to ride switch if you need to without cross-loading your knee. This setup is slightly more playful than a purely positive setup and slack country riders who like popping off features in the powder fields will love this setup set back slightly on their board.
Beginners also benefit from the positive/zero setup as they get all the benefits of having their rear foot fully across the board. This lets you push for skid turns – and braking – more easily than having a purely positive setup which helps boost confidence in beginners. It’s also more comfortable for standing neutrally when you’re not riding.
Positive/negative
Setting your stance to a positive/negative setup, also known as riding duck-footed, means having your rear binding turned out toward the rear of your board. This could range anywhere from -3 degrees, which can just feel a little more comfortable than neutral for some riders, all the way to -15 degrees or even more. A positive/negative setup can work for beginners, but an open duck stance leaves you less stable than keeping your rear foot at zero.
A positive/negative setup is preferred by park rats who frequent the terrain park and freeride riders who use the natural features at the side of the groomers for jibbing around. The positive/negative setup lets these riders land in switch and ride out, or enter features in switch for spins.


