If you’re a serious outdoorsman, you’ll eventually encounter a bear. The experience can be daunting, to say the least. I moved to B.C. from the U.K. a few years back and let me tell you, the first time I saw a bear fronting up to me as I came running around a corner, I seriously considered my future as a trail runner — not to mention my immediate future in general. You do get used to bears, but that doesn’t mean they no longer pose a risk. Mostly, bears will turn tail and head off, but for the occasion that this doesn’t happen, you need to know what to do if you see a bear and survive a bear attack if you want to keep hitting the trail.
How to avoid a bear attack
It’s all well and good knowing what to do if a bear does attack, but there are usually steps you can take to avoid the encounter altogether. It’s great to see these majestic menaces in their natural habitat, but seeing them from a distance and not having an incident is the best way to do this.
Step 1: Bears are commonly attracted to campsites for the same reason they’re drawn to towns: free food. Hanging a bear bag is something every would-be wildlife camper should know how to do properly. Proper campsite management is essential in bear country. This means tidying up after yourself, not taking food — or toothpaste — into your sleeping quarters with you, and hanging your food safely out of reach. Remember to dispose of garbage and clean your pans, too.
Step 2: Alerting bears to your presence is usually the most effective way to avoid startling them. You don’t want to come around the corner on a trail and come face-to-face with a furry menace, do you? Well, they don’t want that, either. Shout, make yourself known, holler, talk to one another loudly, and generally make some noise. That way, the bear has plenty of time to get out of your way before it all becomes too last minute.
Step 3: Be aware of any cubs around, especially in springtime, and avoid getting between a mother bear and her cubs. Bears are protective and will charge and attack if they think you’re trying to separate them. If you see cubs, be aware that the mother will not be far away. Try to distance yourself safely, but be aware of your surroundings until you also see the mother bear — she might be behind you!
How to survive a bear attack
Should you not be able to completely avoid the attack, surviving the bear encounter become imperative. Depending on the type of bear encountered, however, the technique to survive the attack will change somewhat. Here are the most common bears we expect you to find, as well as how to survive the encounter.
How to survive a black bear attack

Black bears are found in 41 U.S. states, as well as throughout Canada. Though they’re named black bears, they can appear in a range of colors and sometimes even look light brown or even blond — we used to have a particularly frustrating cinnamon-colored one that kept climbing our plum tree.
Black bears are smaller than their grizzly cousins, usually up to about 6 feet tall. They’re naturally inquisitive creatures and have an incredible sense of smell, and are usually found foraging for berries or chilling out after a long day. Black bear attacks are rare, but that doesn’t mean you should take them any less seriously.
Step 1: Get big and be loud.
Black bears would rather flee than fight. If you make yourself appear as a threat by waving your arms, shouting, and making yourself big, you should scare black bears away.
Step 2: Use bear pepper spray.
If getting big doesn’t work, reach for the pepper spray. This works on all bears. Wait until the bear is 10 meters away before unleashing your spray, and then leave the area quickly.
Step 3: Do not be tempted to run or climb a tree.
By running, you risk sparking the black bear’s predatory instinct, and they may decide you look like a tasty treat. Black bears are excellent climbers, and any tree you might shimmy up you can guarantee they will do so much more easily.
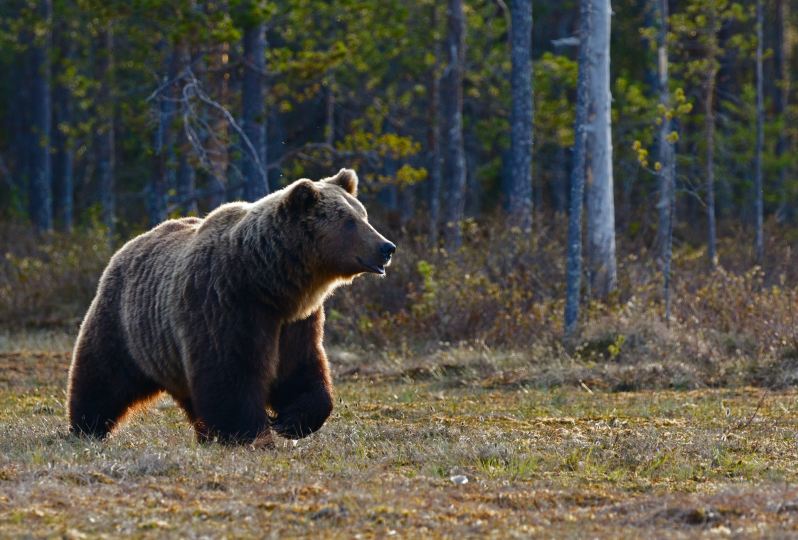
How to survive a brown bear (grizzly bear) attack

Brown bears are typically bigger and more aggressive than black bears. They can be told apart by their trademark hump of muscle on the upper back. Brown bears are the most widespread species of bear in the world and can be found throughout Canada, Alaska, Asia, Russia, and in areas of the northwest United States — Washington, Idaho, and Montana. Brown bears can grow up to 6.5 feet and often weigh well in excess of 1,000 pounds.
Brown bear attacks are most common in late spring, where mothers become fiercely protective of their young cubs. Food shortages and curiosity can also lead to brown bear attacks. If you meet a grizzly, stand your ground and do not run. These bears can run at around 35 mph over rough and rocky terrain, so the chances of you outpacing one are pretty low.
Step 1: Stay calm.
Do not shout or make yourself big. Instead, stay calm, keep your bear spray in your hand, and slowly back away while talking calmly in an appeasing voice. Don’t turn your back on the grizzly, but move slowly away to show you are not a threat. A grizzly may bluff charge or bang the ground to show dominance.
Step 2: Use bear pepper spray.
If backing away doesn’t work and the grizzly keeps approaching, be ready with your pepper spray. This is best used at a range of around 10 meters, and once fired, you should move away and out of the area.
Step 3: Play dead.
If the bear continues to attack, or if you don’t have pepper spray, your best chance is to play dead. Tuck into a fetal position and protect your neck and head. If you have a backpack, position yourself so that this protects you. Brown bears attack when they feel threatened, and if you remove the threat, they often stop attacking.
Step 4: Don’t get up right away.
Wait around 20 minutes, until you’re sure that the brown bear has gone, before getting up again. You’re probably going to want to sit down for a few minutes anyway, but make sure you don’t suddenly jump up and present the bear with another threat.
How to survive a polar bear attack

Polar bears are enormous and can stand anywhere between 7 and 10 feet tall. Alongside the Kodiak bear — a subspecies of the brown bear — polar bears are the largest bear species in the world. The good news is that unless you specifically head into the Arctic circle, you’re unlikely to stumble across a wild polar bear.
When you’re used to being the apex predator of an environment and seeing everything else as prey, it’s hard to view an intruder as anything other than the next meal. Polar bears don’t see a lot of humans, so be prepared that the largest carnivore on earth might just want a piece of you. Playing dead or trying to intimidate these bears won’t work, so how do you protect yourself from a polar bear attack?
Step 1: Go with a guide or arm yourself.
Firearms are statistically not as effective as bear spray, but that’s mainly because of most people’s relative lack of experience using one — especially when faced with a ten-foot-tall polar bear. If you’re about to head into polar bear territory, though, it’s time to get competent with a high-caliber weapon. Either that or hire a guide who will do that part for you.
Step 2: Use bear pepper spray.
As with all other species of bear, pepper spray is your most effective method of fighting off a polar bear.
Step 3: Fight like your life depends on it.
Because it does. The chances of you bettering a polar bear in hand-to-paw combat are pretty slim, but if all else fails you might just have to try your luck. Aim for the eyes and nose and try to avoid those enormous paws. The good news is that if you survive an all-out brawl, you’ll be so unusual that you can probably make decent money from a book release.
Surviving an attack from an unidentified bear
Many times, a bear encounter can cause anxiety and you may not be able to identify the bear type and can’t think of specific steps to take. So here are general things to do if you see a bear on the trail:
- Stay calm and don’t run. Bears are faster than humans and can outrun you even if you sprint. Running may trigger a chase response in the bear. If the bear isn’t moving, you can move slowly sideways, so you can keep an eye on the bear and avoid falling. The sideways motion isn’t threatening to bears.
- Make yourself look as big as possible. Stand up straight, raise your arms above your head, and get to higher ground (if that’s an option).
- Identify yourself in calm voice. Talk calmly to the bear, so it knows you’re a human and not a prey animal. This helps the bear recognize you as a human.
- Use bear spray (if you have it it). If the bear approaches, use bear spray. Bear spray is a very effective deterrent against bears. Aim for the bear’s face and spray until the bear runs away.
Things you should not do:
- It has been stated already, but it’s worth repeating. Do NOT turn and run.
- Do NOT allow the bear access to your food.
- Do NOT drop your pack.
- Do NOT climb a tree.
One final note: If you’re in a developed area, such as a campground or picnic area, and you see a bear, report it to a park ranger or other authority figure.
What areas in the U.S. and Canada have the most bear attacks on humans?

While bear attacks are relatively rare in both the U.S. and Canada, some areas do see more encounters than others. Here’s a breakdown by region, keeping in mind that safety and awareness are always crucial in bear country, regardless of statistics.
Alaska: Home to the largest brown bear population in North America, Alaska also leads in bear-related incidents. The coastal regions around Katmai National Park and Denali National Park are particularly noteworthy.
Western Canada: British Columbia and Alberta in Canada share a large grizzly bear population with Alaska. Mountainous areas like Banff National Park and Jasper National Park are prime grizzly habitat.
Rocky Mountains: From Idaho to Montana and down to Colorado and New Mexico, the Rocky Mountains offer diverse habitat for both black bears and grizzlies. Yellowstone National Park and Glacier National Park are popular spots for both humans and bears.
Knowing how to survive a bear attack is outdoorsman 101 knowledge. I stand by the fact that you should do everything in your power to avoid a bear attack, but if you’re serious about hitting those remote trails and camping out under the stars in the backcountry, you need to be prepared. Learn how to identify different species and always keep your bear spray close at hand.