
When winter hiking, one of the most essential pieces of gear will be your footwear. The right hiking boot can carry you comfortably for miles, but there are many cases where normal hiking boot lugs won’t give you the traction you need. These cases become even more apparent during the wintertime when you’re liable to slip on ice and dislocate your shoulder like one of my unfortunate family members — the nearest hospital was over two hours away. Microspikes and crampons can significantly reduce the risk of hospital visits while out in the winter wonderland, but how do you know which ones to pack? In this guide, we’ll discuss microspikes vs crampons and how to stay safe.
Microspikes vs crampons: what’s the difference?

Adventuring with microspikes
Microspikes are a flexible, rubber harness that goes over your hiking boot. The rubber is attached to several small chains that go underneath your foot, connecting multiple plates of short spikes to the bottom of your shoe. Think of it like the footwear version of tire chains. The microspikes themselves are generally a fourth of an inch to a half of an inch long, made of hardened steel. Short but sharp, these spikes are perfect for gripping packed snow and ice that might otherwise send you to the E.R.
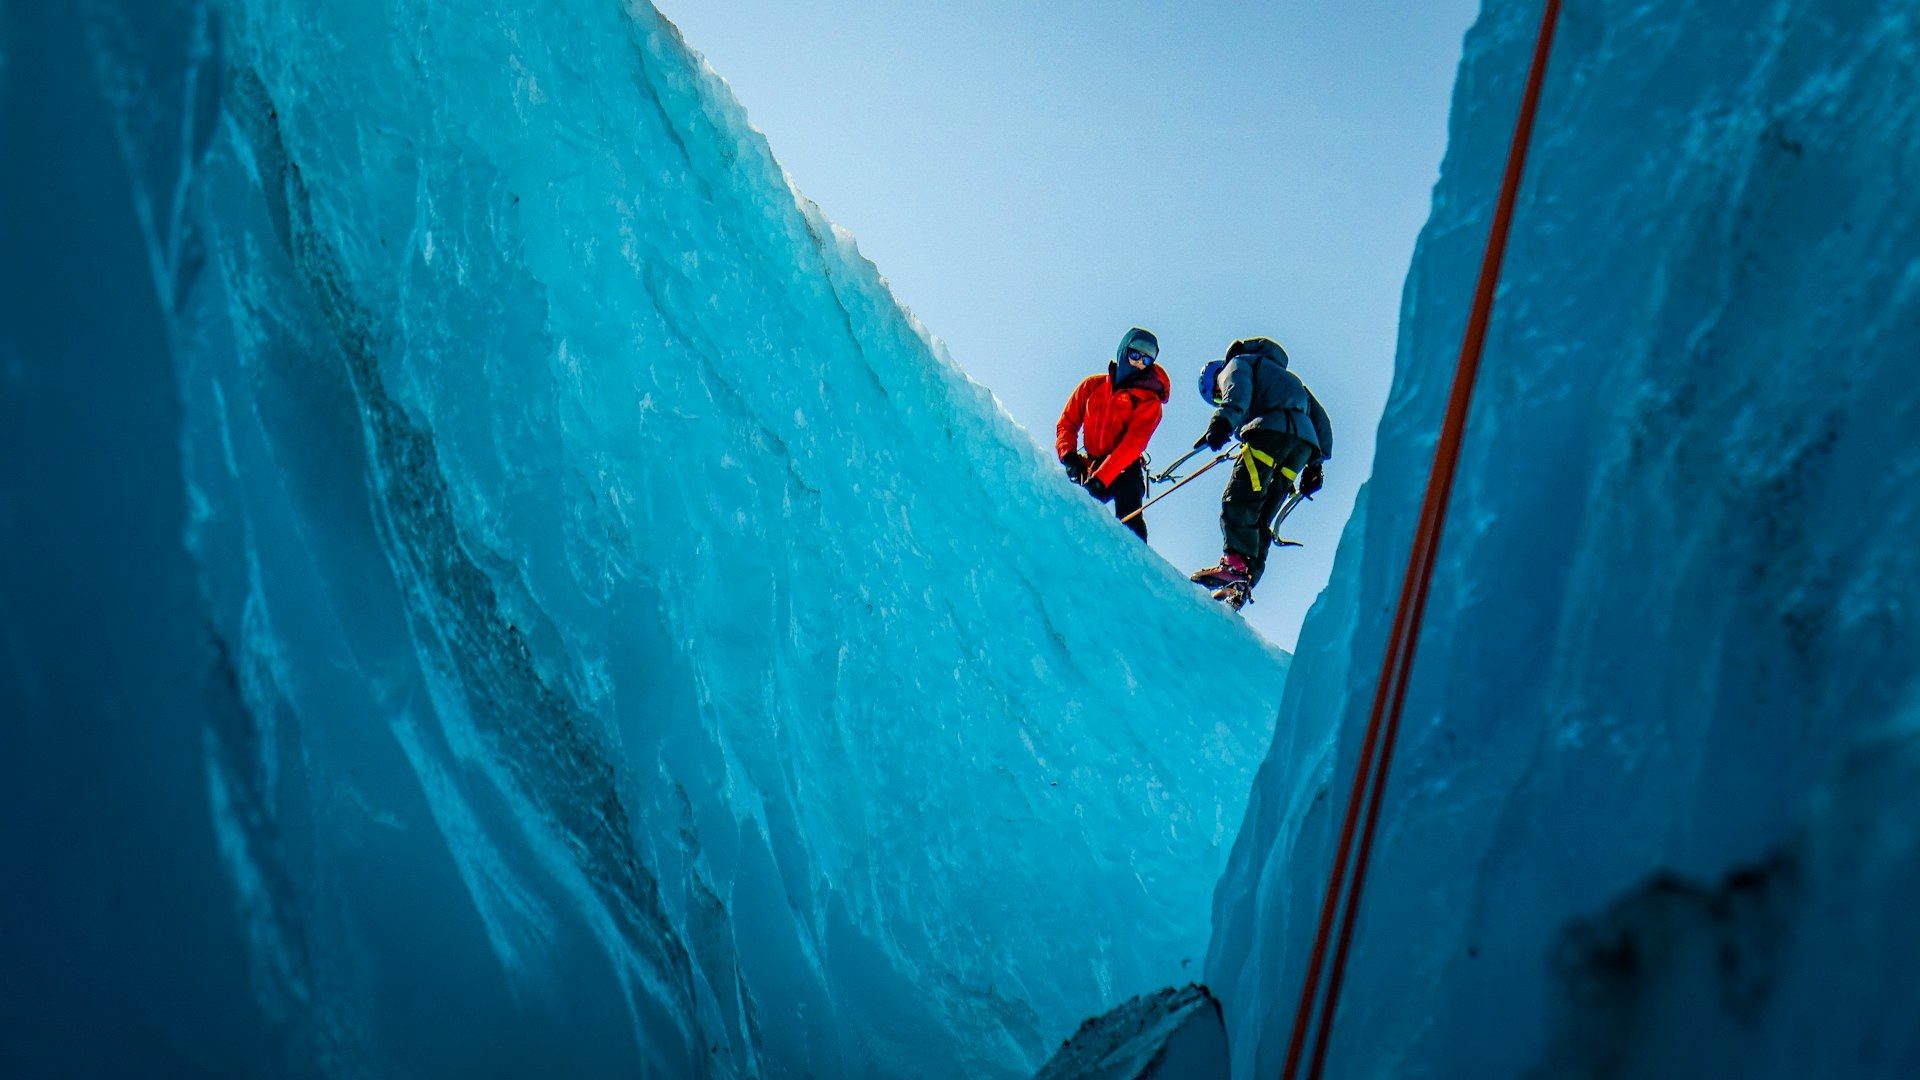
Adventuring with crampons
Crampons are the spiked-collar version of microspikes. They have a similar rubber harness, but they will likely have additional rigid metal frames with longer spikes. The length ranging from three-fourths of an inch to even an astounding one and a half inches can look pretty intimidating once you have them strapped properly. Personally, I would resist the urge to practice karate kicks.
Choosing microspikes vs crampons
Microspikes are best for light snow, packed snow, and icy hiking trails. Ideal for winter hiking or trail running, these will serve you well on flat or moderate slopes. I love microspikes because they’re lighter and less intimidating than crampons. They tend to be easier to put on and pull off, and even better, they’re comfortable during long hikes.
As soon as the trails steepen, I’ll be switching to crampons. It’s all too easy to slip down a slope, and sometimes microspikes won’t be enough to grip the ice. If the terrain is particularly technical, like around glaciers, for example, I might leave my microspikes at home, but more on that later. Mountaineers prefer the extra grip that crampons provide on adventures that include ice climbing, but they can be heavier and bulkier and sometimes even require compatible boots.
Crampons will be an overkill for casual hiking, but if you anticipate seeing both kinds of terrain on your hike, some winter hikers will opt to carry both to be prepared for any terrain ahead. It’s important to note that wearing the wrong kind of spikes, like wearing crampons on soft terrain, can be awkward and even damage your gear. Only wear crampons on steep ice, glaciers, or mixed terrain where they are necessary, and use microspikes for those less-intense moments. Don’t use crampons or microspikes on exposed rock or pavement like a road or a parking lot to avoid dulling or bending the spikes.
Whatever you do, it’s a good idea to wear a pair of gaiters to protect you from accidentally stabbing yourself — that’s another emergency room trip just waiting to happen.
How to take care of your microspikes and crampons
Taking care of your gear isn’t just about making them last longer. Your safety will depend on them. Once you’re back home, make sure to rinse all of the mud, dirt, salt, and snow with warm water. You may need to use a soft cloth or a brush to clean everything off. Then dry your microspikes and crampons completely to prevent rust. Remove all moisture with a dry towel, and then leave your crampons and microspikes to air dry in a warm, ventilated space. If your gear has rubber, don’t hang them hear a heat source like a fire because this can weaken the rubber or even damage the coating on the spikes.
Most importantly, check for damage. Stretched or broken chains, tears in the rubber harness, or dull spikes are all great reasons to grab a new pair. You can sharpen crampon spikes with a metal file if needed, but only sharpen the front points and side points when necessary to avoid excessive grinding. REI has some great resources about caring for your crampons.
Most crampons or microspikes come in a handy case. Store yours in there or in a pouch or a bag to protect them from tangling or damaging your other gear. To prevent rusting and rubber degradation, keep them in a cool, dry place. Silica gel packs are perfect for absorbing any excess moisture if you leave one or two in there with your gear.
Even if you’ve checked your gear thoroughly after your last trip, it’s always a good idea to examine them before your next one, just to make sure you didn’t miss any tears or that rust didn’t accumulate. If maintained properly, crampons can often last years.


