Improve your snowboarding edge transition with this easy-to-follow rule

Linking turns is a fundamental of learning to snowboard. This advice will help

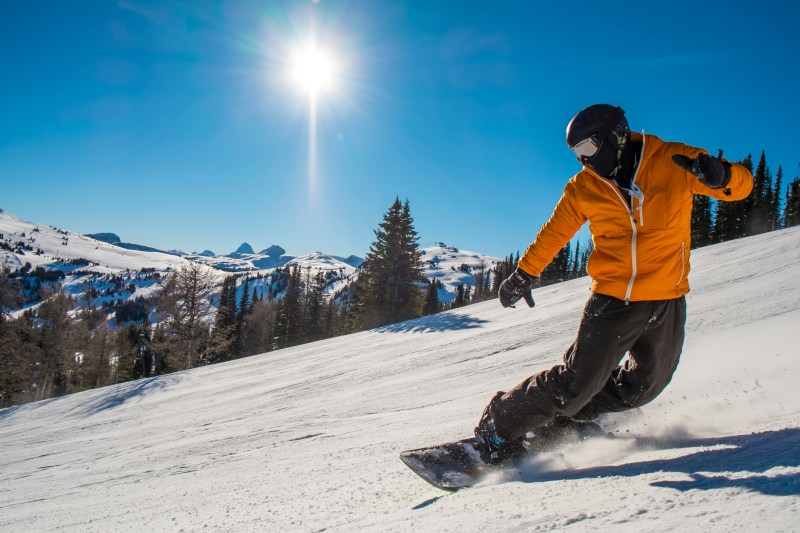
Snowboarder cranks turn on mountain slope
ASCENT XMEDIA / Getty Images

The key fundamental of snowboarding and the aim for all beginners is the hallowed ground of linked turns. Most likely, you’ll start by side slipping, with a little falling leaf to move across the hill — using your edge to zig-zag down the hill without turning. Then you’ll want to start working toward S turns, and this means transitioning from heel to toe edge or vice versa.

Every snowboarder you see has been in this position — yes, even that guy carving a snowboard and sending huge spins off jumps. Linking your turns together isn’t easy, but without it, you’ll find yourself stuck in a thigh-burning position all day. Perhaps the biggest challenge associated with linked turns is edge transition. This is the moment when you shift your weight from one edge (the uphill edge) to the other (the downhill edge) in order to initiate your snowboard turn. Doing this at the right moment, without tripping over that edge, requires practice, but we’ve got a gem that can help you out next time you’re hitting the slopes.

ONE RULE FOR AN EARLY EDGE CHANGE

As Malcolm Moore explains in this video, when you’re snowboarding, you need to imagine there’s an arrow pointing out from you in the direction you’re moving (not the direction your board is pointing). The earliest point in a turn you can make any edge change is when your board matches the line of that arrow.

Recommended Videos

Understanding this advice in more detail

To understand this, it’s important to know that the angle your snowboard is pointing at and the direction that you’re traveling in — your momentum — are not necessarily the same thing. Think about when you’re side slipping. If you were to draw an arrow from the front of your snowboard, it would be pointing across the slope. Draw another for your direction of travel, and it would be pointing down the mountain, often at 90º to your snowboard arrow.

This is the same if you skid out of a turn — which most beginner snowboarders will do — rather than carving your snowboard turns. Your snowboard finishes the turn pointing across the mountain, but your momentum is still taking you downhill, meaning the snowboard’s direction is not aligned with your momentum arrow. If you’ve ever tried to change edge at this moment, you probably took an absolute whipper as your downhill edge caught and threw you off balance, downhill.

Instead, you need to control your skid and get your snowboard moving back across the slope on either your heel edge or toe edge. In other words, align your arrows. Only then should you begin to initiate your next turn. The next time you head out snowboarding, think about visualizing these two arrows. Ask yourself two questions: Where is my snowboard angle arrow pointing? Where is my direction of travel arrow pointing? When these arrows align, it’s time to turn.

As you progress your turns, you’ll find that these arrows spend more time in alignment. Your skid turns become carved, at least in part, and you spend more time with your snowboard in the fall line of the mountain. In both these positions, your arrows are aligned.

Trust me: As someone who took a fair few whippers, I learned this the hard way. Fortunately, you don’t have to.

What exactly is a ‘whipper’

A whipper in snowboarding is exactly what you might think it is — a fall or crash. Whippers can happen if you don’t take the advice here and you catch the edge of your snowboard. They can also happen if you land awkwardly or hit a hard patch of snow.

Here are some tips for avoiding whippers:

  • Be aware of your surroundings and avoid riding in areas with obstacles or uneven terrain.
  • Be in control of your speed and make sure you feel comfortable with the slope you’re riding on.
  • Use proper technique when turning and landing (such as the above advice).
  • Wear a helmet and other protective gear.

If you do fall, try to tuck and roll to minimize the impact. Whippers are a real part of snowboarding, however, with the advice given here, you may avoid them.

Tom Kilpatrick
A London-born outdoor enthusiast, Tom took the first ticket out of suburban life. What followed was a twelve-year career as…
Camper van vs Class B RV: How to choose which to buy for your outdoor adventures
Class B RV vs Camper Van - who ya got?
Man building a campfire in front of a Winnebago Ekko Springer camper van.

If you would love to go on road trips and experience the best national parks, there is no better way to do it and still feel comfortable like you’re at home than camping in an RV. Let’s be honest: You will enjoy sleeping on a cozy bed in an RV with an air conditioner more than in a moist and chilly tent. It’s also easier to prepare your meals in an RV because of the refrigerator, and you don’t have to worry about packing and unpacking your camping bags every night or morning. 

However, the big RVs can be a headache if you're driving through low-hanging bridges or tight spaces. They’re also more expensive to fuel and maintain compared to smaller-size vehicles. Alternatively, you could choose a Class B RV or a camper van if prefer an RV that strikes a balance between rural camping and big-city adventure. But the question is — what’s the difference between a Class B RV and a camper van? And which one should you buy?
A Class B motorhome is built with all the camping amenities

Read more
Dust off your gear, it’s time to hit the trail: The spring hiking tips you need
These tips will keep you safe and comfortable on the trail
A person hiking

I don't know about you, but I love the fact that spring is here, and I can hit the trail again. I went out the other day without having to load up in all of my outdoor layers and enjoyed a trail run along some snow-free tracks. It's that time of year when you can dust off your hiking boots, dig out your trekking poles, and start to make some hiking plans. But spring isn't all sunshine and dry tracks. A little like fall hiking, spring trails can be muddy, and some of the wettest, coldest days I've had on the trail have come in springtime. Maybe it's not quite a time to pack away all that warm gear after all.

Spring is changeable. That's what I'm getting at. It's perhaps the toughest time of the year to pack a hiking pack because, on any given day, you might need to change layers four times. The days are long enough to get a good hike done, but you can still find yourself caught out after dark if you're not careful, and once that sun drops, the temperature goes with it. In return, though, spring rewards us with those golden hours at sunrise and sunset — the outdoor photographer's dream — raging waterfalls as the snow melts off, and the sounds and sights of nature coming back to life after a winter's hibernation. It's great if you get it right, and if you follow our spring hiking tips, you won't go far off track.
Dress and pack accordingly

Read more
This terrifying video proves why ski lift wind holds are a thing
Frozen chairlift in Tignes, Rhone-Alps, France

My favorite chairlift is the FourRunner Quad at Stowe Mountain Resort. Rising more than 2,000 vertical feet over steep pitches and offering a panoramic view of Mountain Mansfield, the lift is an icon of the eastern winter experience. It’s like ascending a rollercoaster.

The FourRunner lift starts loading at 8:00 a.m. In the lead-up, skiers and riders are raring to go, with excited banter and equipment adjustments filling the air. But sometimes, when the clock strikes eight, empty chairs continue up the hill, and resort staff notifies everyone of a “wind hold.” That occurs when winds reach about 40 mph, presenting a safety hazard for occupants.

Read more